IPTV Smarters Pro Setup Tutorial (Extended)2023 -Update
IPTV Smarters | IPTV Smarters Pro APK Setup Firestick (Android/iOS) 2023 - TV Team
IPTV Smarters and IPTV Smarters Pro is a free default IPTV Player application for iOS and Android devices. This company offers a range of premium services related to IPTV, such as automatic payment options, website creation, and customization of their APK. They are known for their popular IPTV applications, IPTV Smarters and IPTV Smarters Pro, which are available for free on Windows, Android, and iOS.
These applications offer a range of useful features for IPTV users, including an electronic program guide, categorization of channels, logos for channels, and the ability to favourite and hide channels.
Nowadays, The IPTV application offers a range of useful features for users, including an electronic program guide, the ability to group and categorize channels, logos for channels, the ability to favourite and hide channels, and more. These features are essential for an optimal IPTV experience.
The application is effortless, but many users need to learn how to set up IPTV Smarters App and its settings.
Here is a step-by-step tutorial on how to use the IPTV Smarters Pro App.
IPTV Smarter Pro Features:
- Auto-Updating Channels/Movies/Series from source
- No need to log in every time, and no ads.
- Support for channels by groups/categories/countries.
- EPG (electronic program guide) support, EPG timeshift (auto-update)
- Catchup (Streams recording)
- Favourite, Parental Control
- Account information (expiry, creation and more)
IPTV Smarters & IPTV Smarters Pro Setup (Step by Step):
Step 1:
Step 1:
To begin, install and launch the software on your device.
You can download IPTV Smarters Pro's latest APK from Playstore | iOS Store
Step 2:
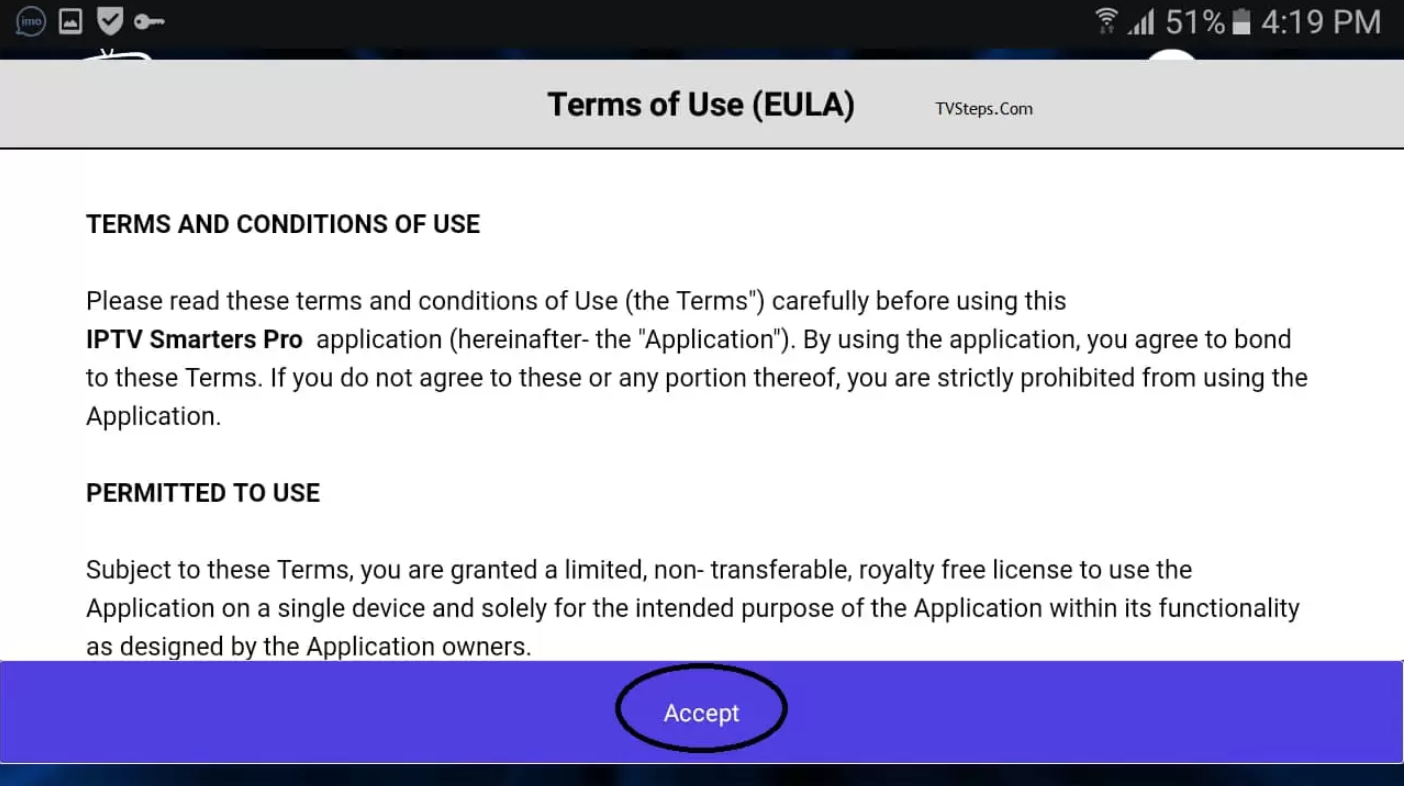
Open the App, and there you need to accept their terms of use for the first time.
Step 3:
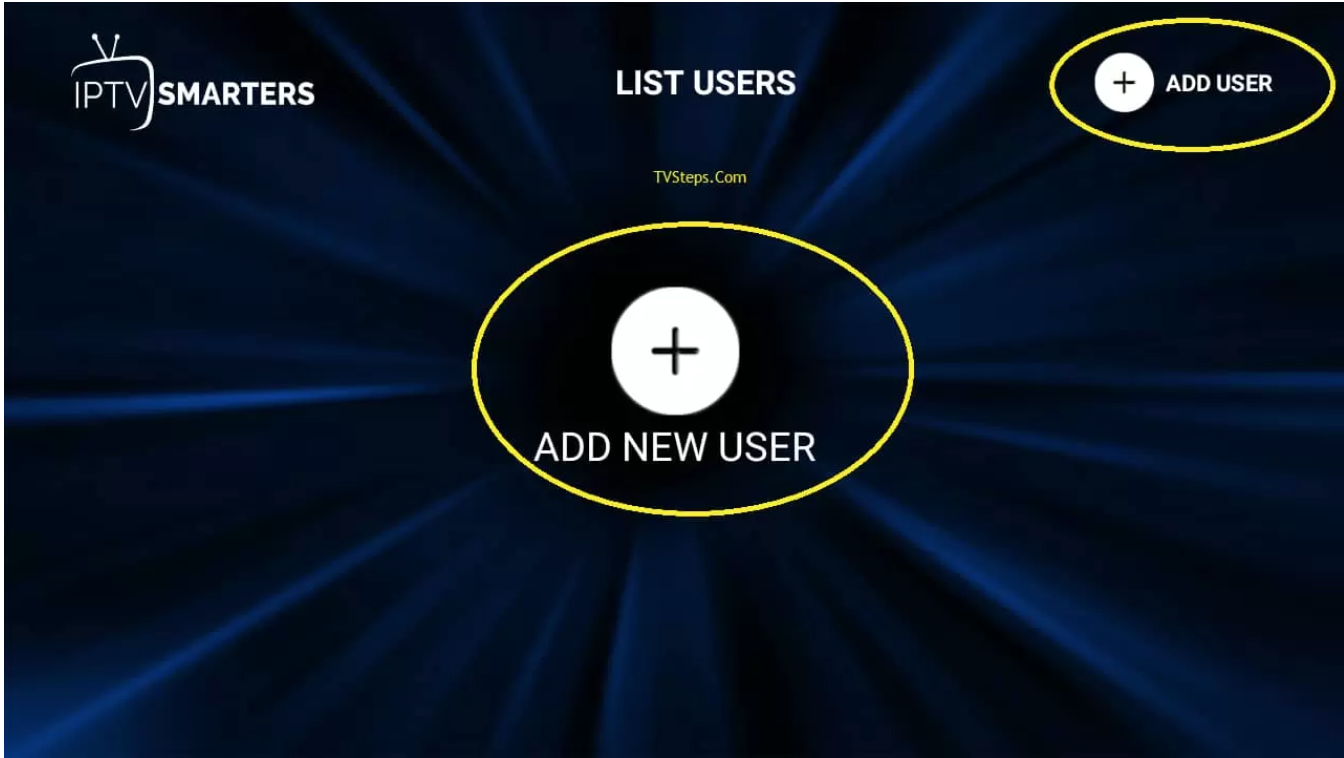
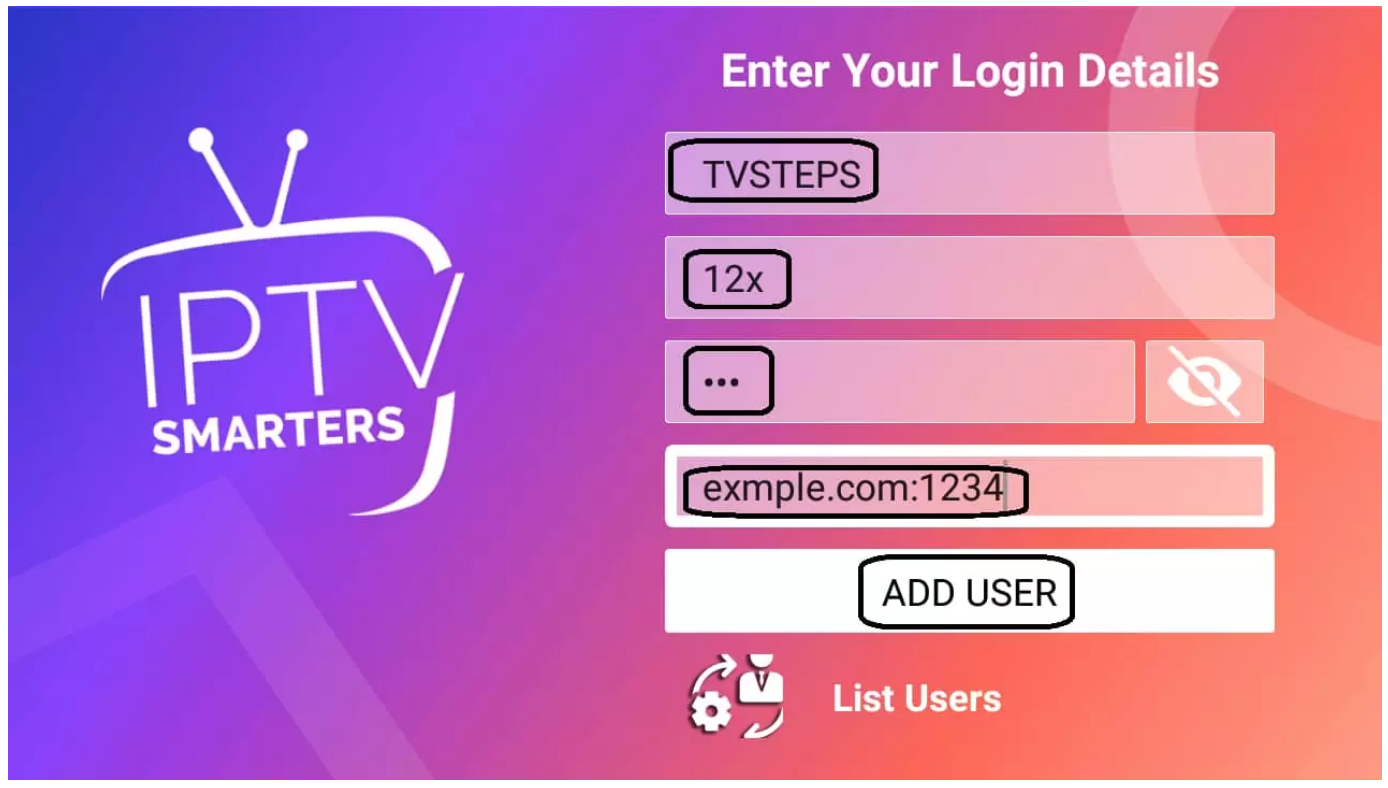
As the TOU is accepted it will ask you to ADD a NEW USER
Step 4 via File/URL:
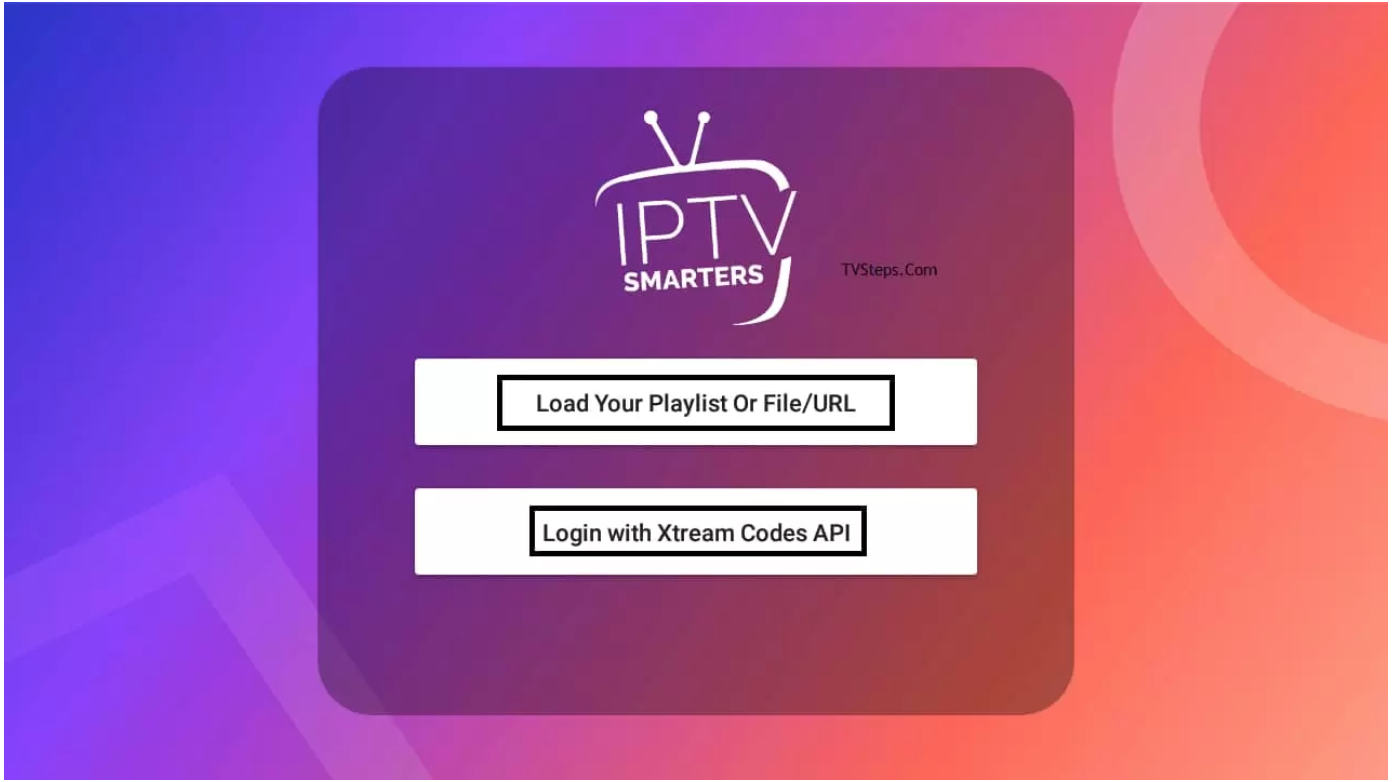
There are two ways of adding a profile/user of IPTV. 1 login with Xtream Codes API and second Load your Playlist or File/URL.
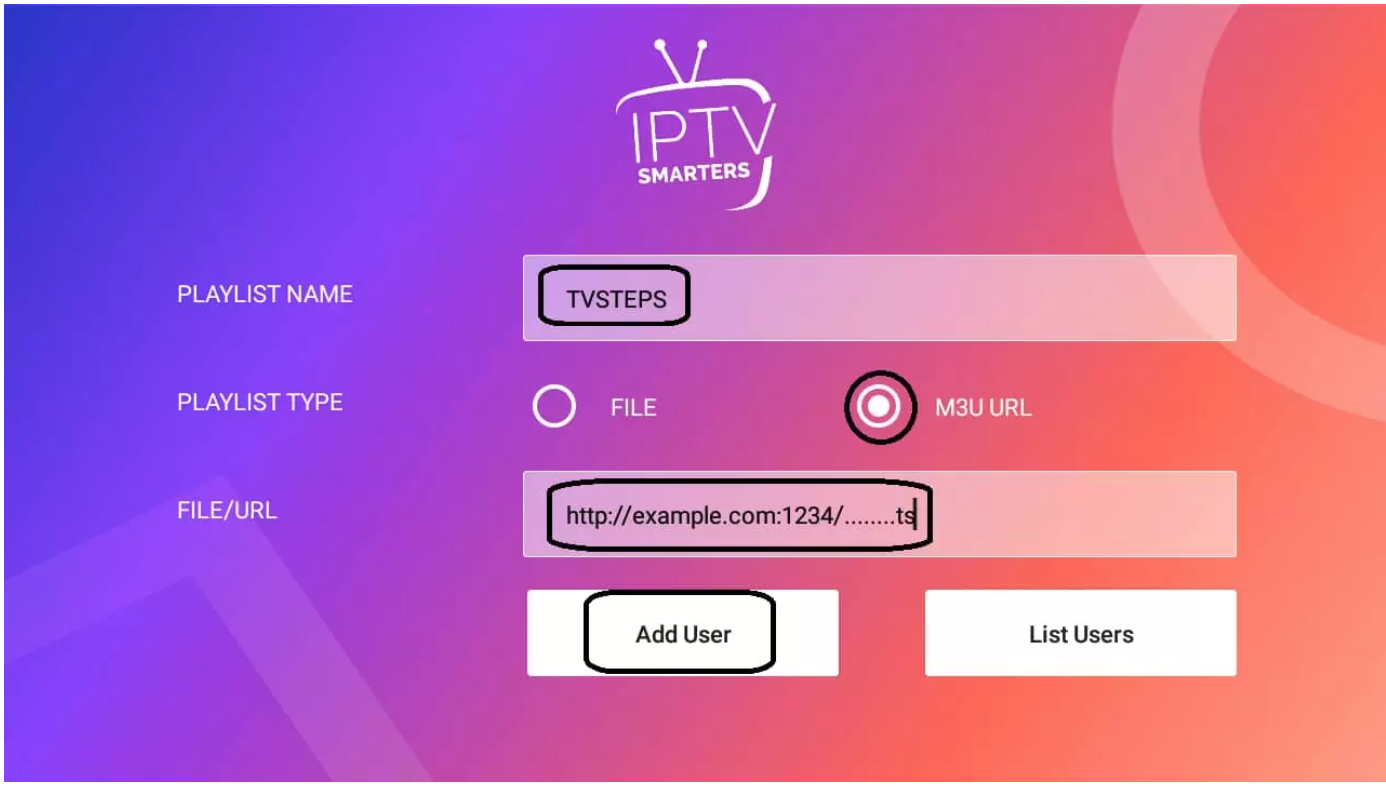
For File/URL, click on the first option and add the long URL of m3u or select the downloaded m3u file and use any Name. Now click on Add User.
To login, in via API, we need to use an m3u link login. Here is the way of using data. An m3u link will look like this; http://example.com:8000/get .php?username=test17&password=test238&type=m3u .
If you have found the information on our knowledge base helpful and want to explore our complete range of services, we welcome you to try them out with a free trial on our website.
Enjoy exceptional customer support from our dedicated team, known for their reliability.
Claim Your IPTV Trial - Absolutely Free!
Need quick answers to your questions? Our live chat service is here to assist you with prompt responses from our chat agents. 💬
You can choose from various easy payment options like Credit/Debit cards, PayPal invoice, Bitcoin (BTC), Bank Transfer, or even Apple/Google Pay.
you can log in by using this link. http://url_here.com:port/username password/
Step 5:
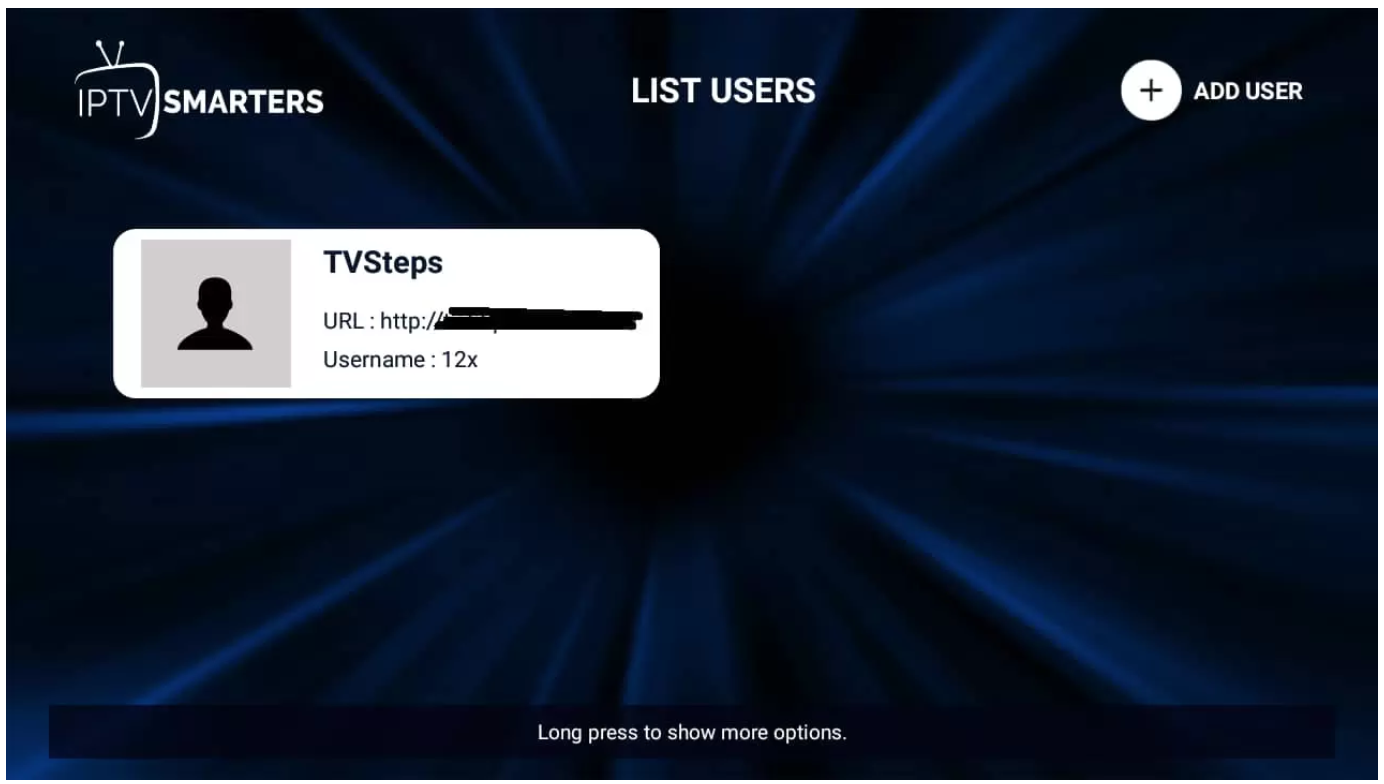
After logging in, a profile will be created for you.
This profile will contain information about your account and preferences.
Step 6:
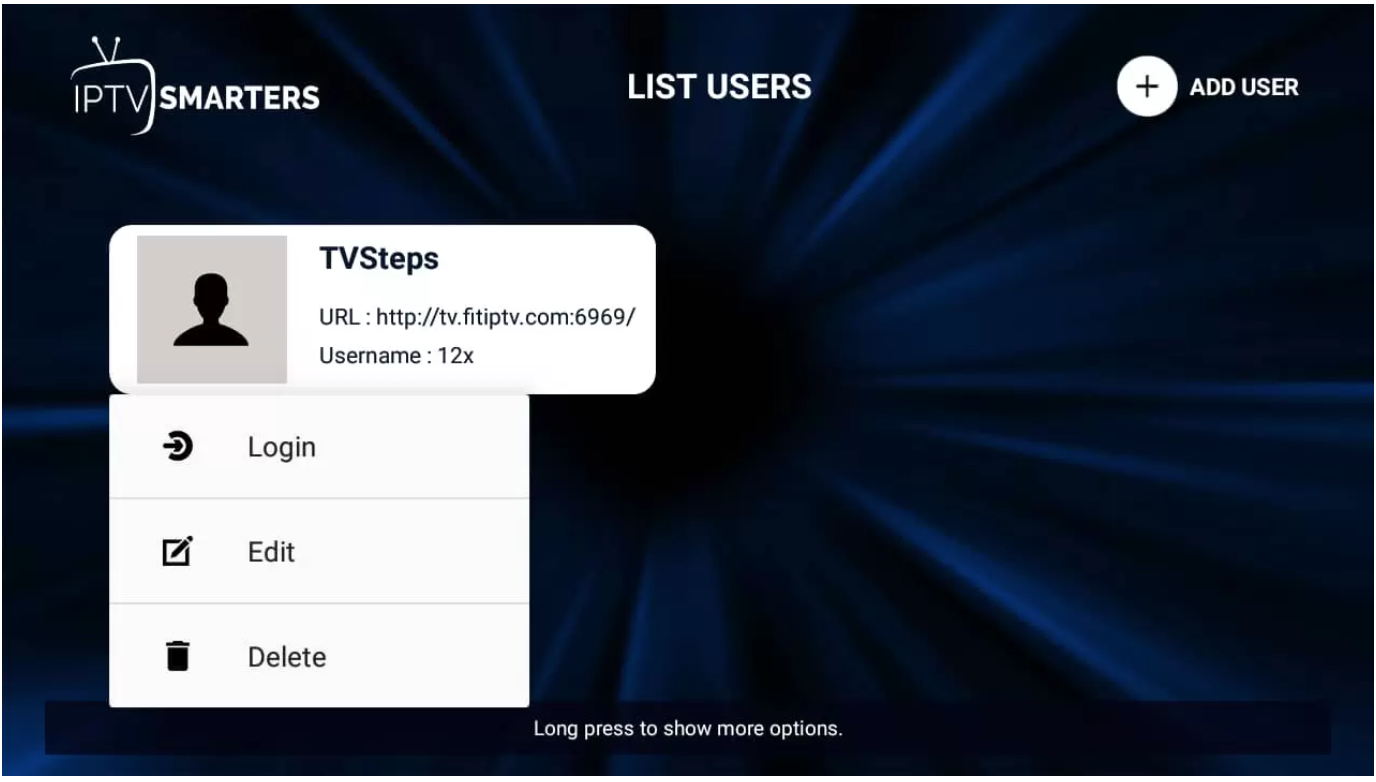
To access your profile, click on the "profile" button. If this does not work, try pressing and holding the button.
When you access your profile, you will see three options: "login," "edit," and "delete.
Step 8:
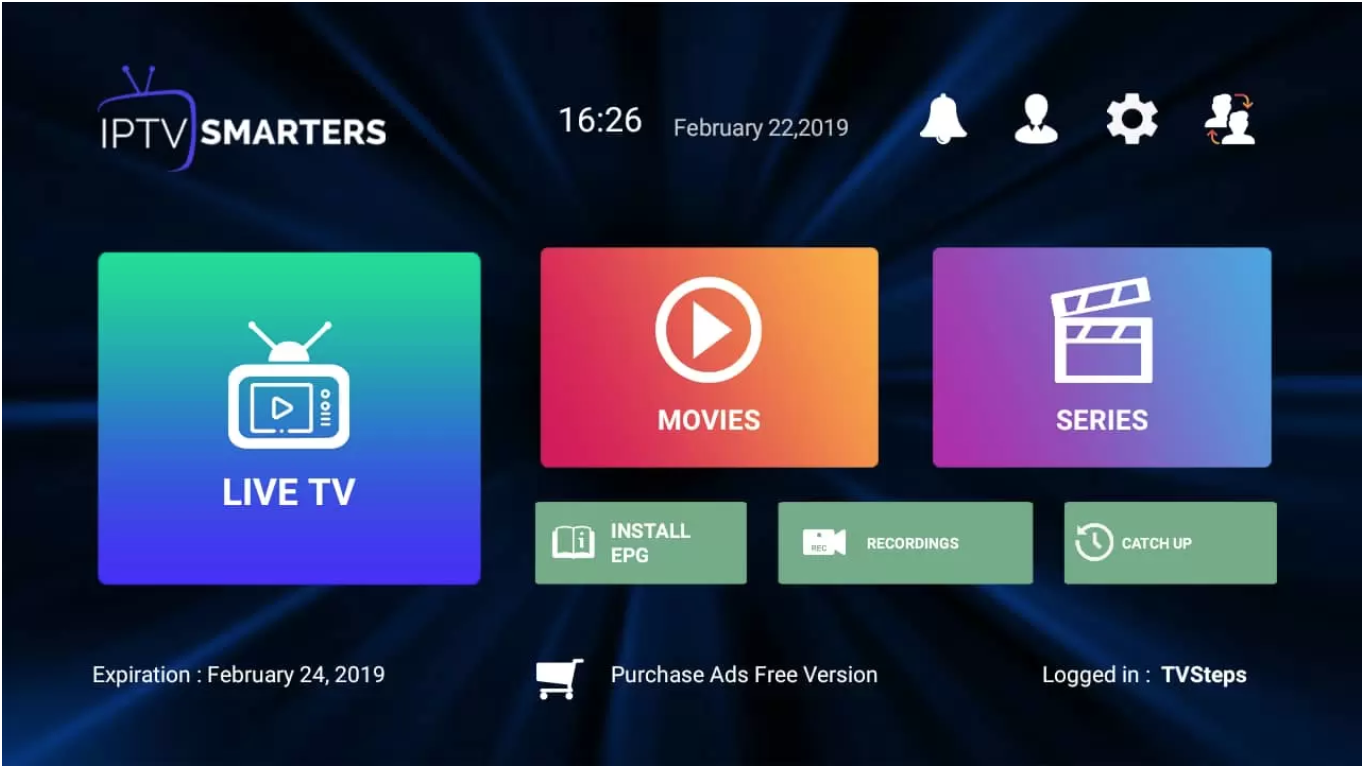
We're successfully logged in and are now on the dashboard. There you can see many options like LIVE TV, MOVIES, SERIES, INSTALL EPG, RECORDINGS, CATCHUP and 4 icons above of users, settings, account info and notifications. You can simply click on Live TV and enjoy services.
More Features and Guide:
Series:
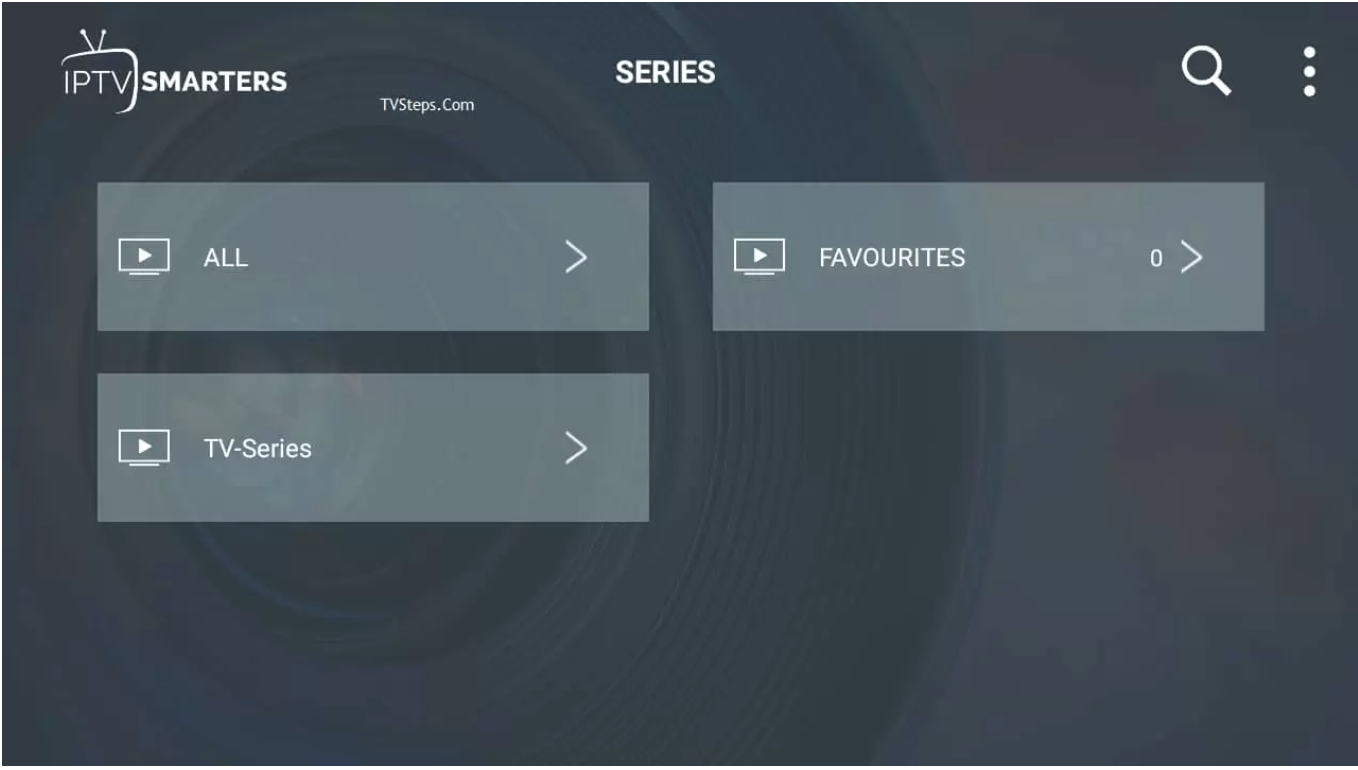
Click on the SERIES tab from the dashboard and you'll get the list of series available there and watch it.
Install EPG:
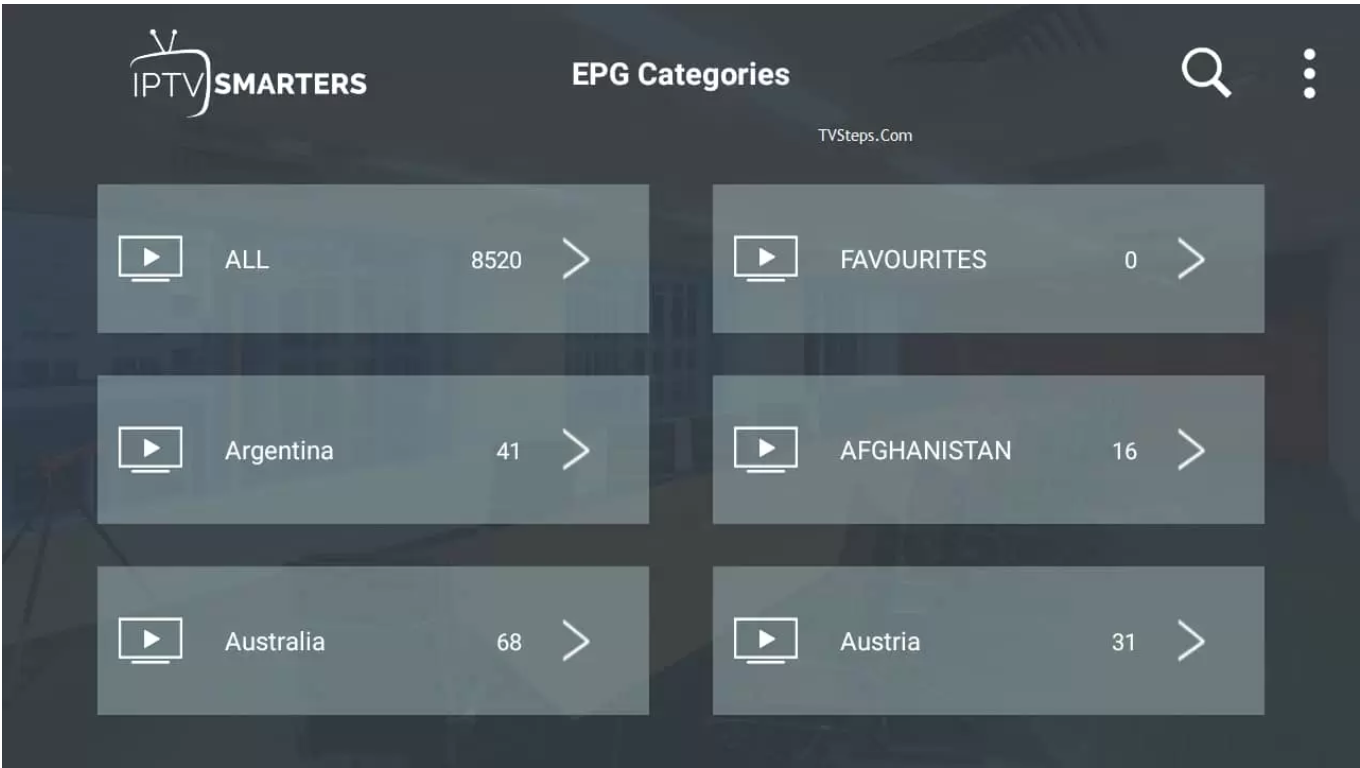
Clicking on Install EPG available on the dashboard will start loading EPG automatically. Just click on this and nothing to do here anymore.
Recordings:
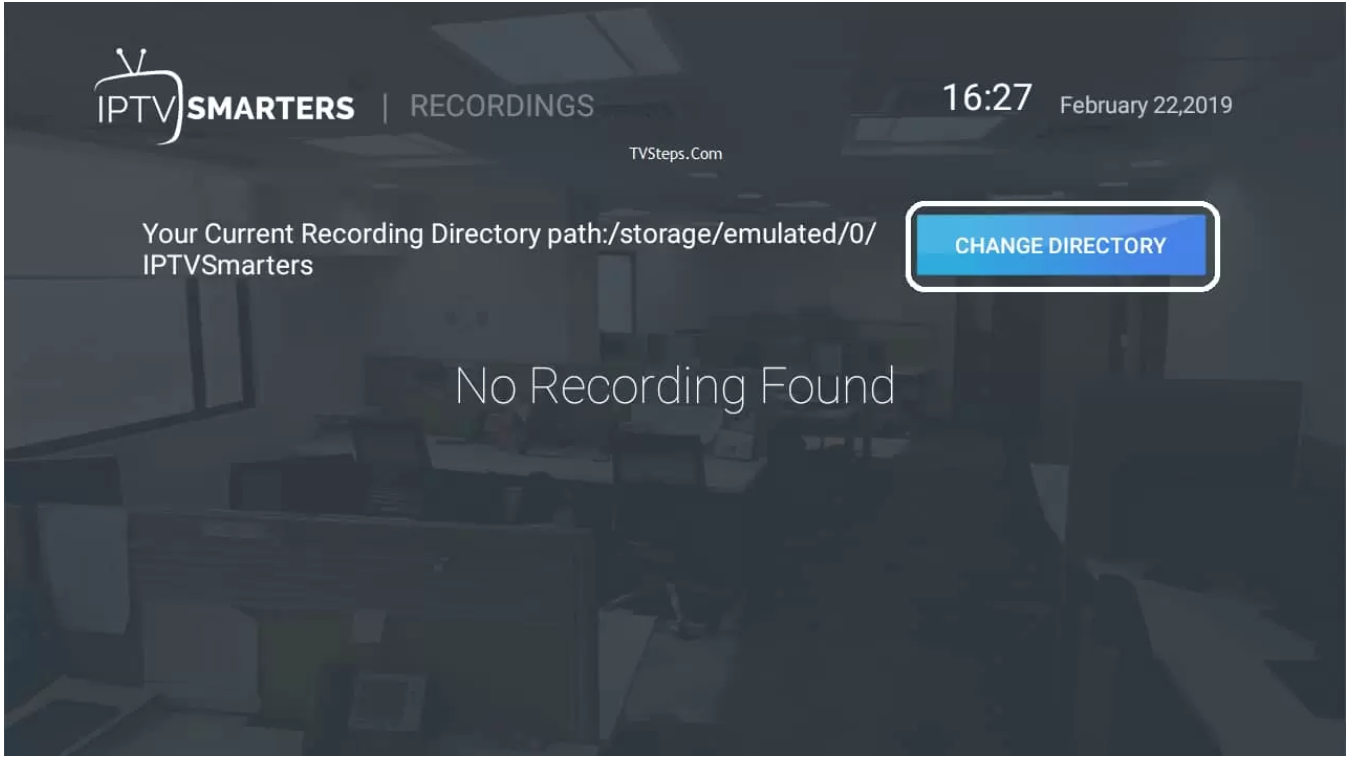
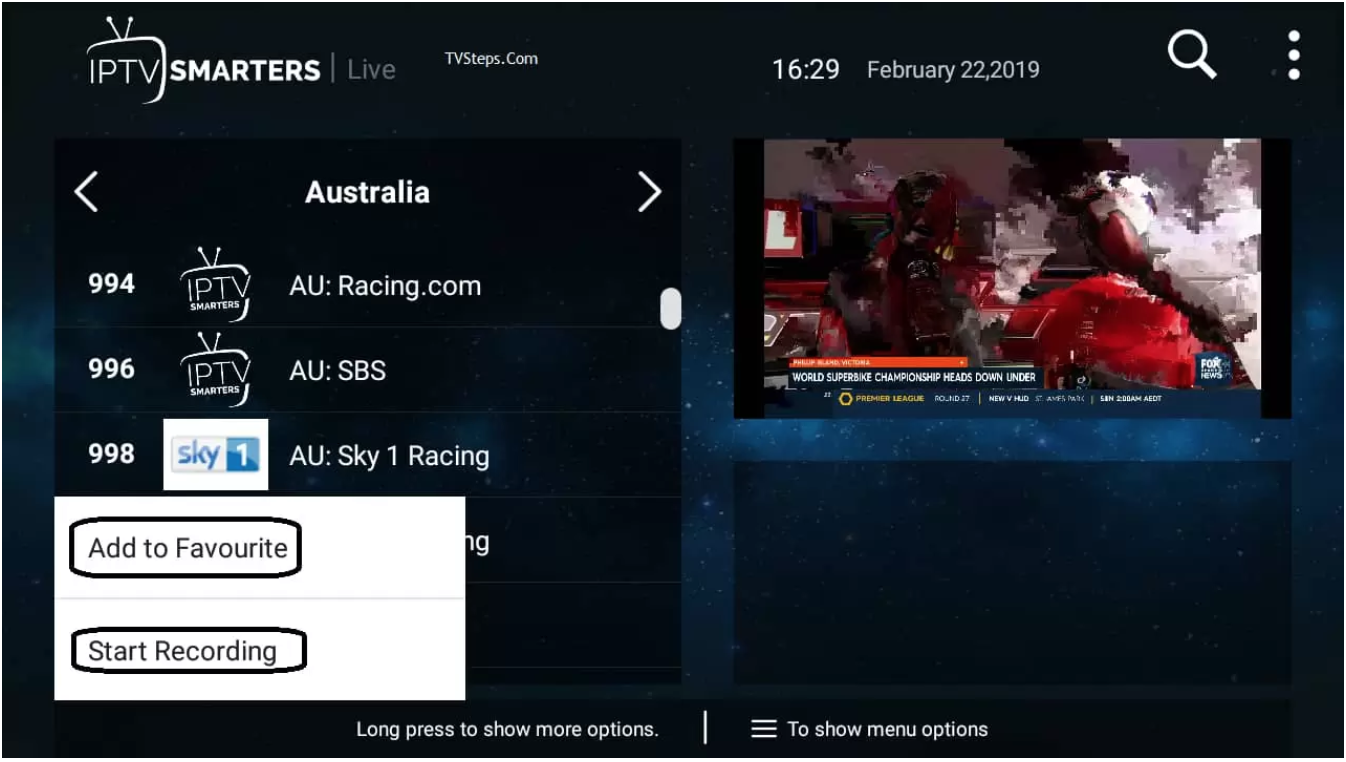
If you press and hold on a channel while watching it, you will be given the option to start recording the program. This allows you to save the program to watch again later, and you can choose where to save the recording in an offline folder.
Catchup:
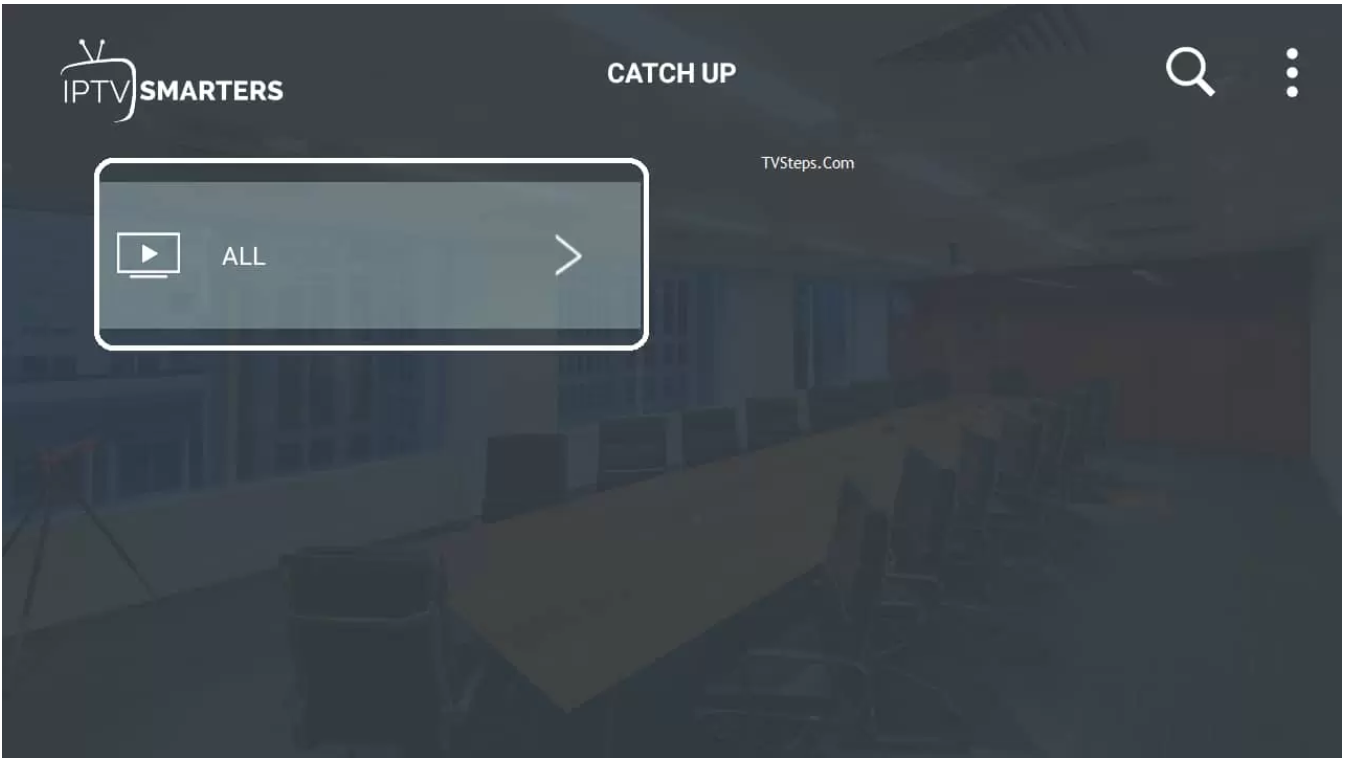
Catchup is another best recording feature provided by your IPTV service provider.
When you store a file on the server instead of saving it offline, it is always available to access. This is a better option than saving recordings locally because you don't have to worry about running out of storage space.
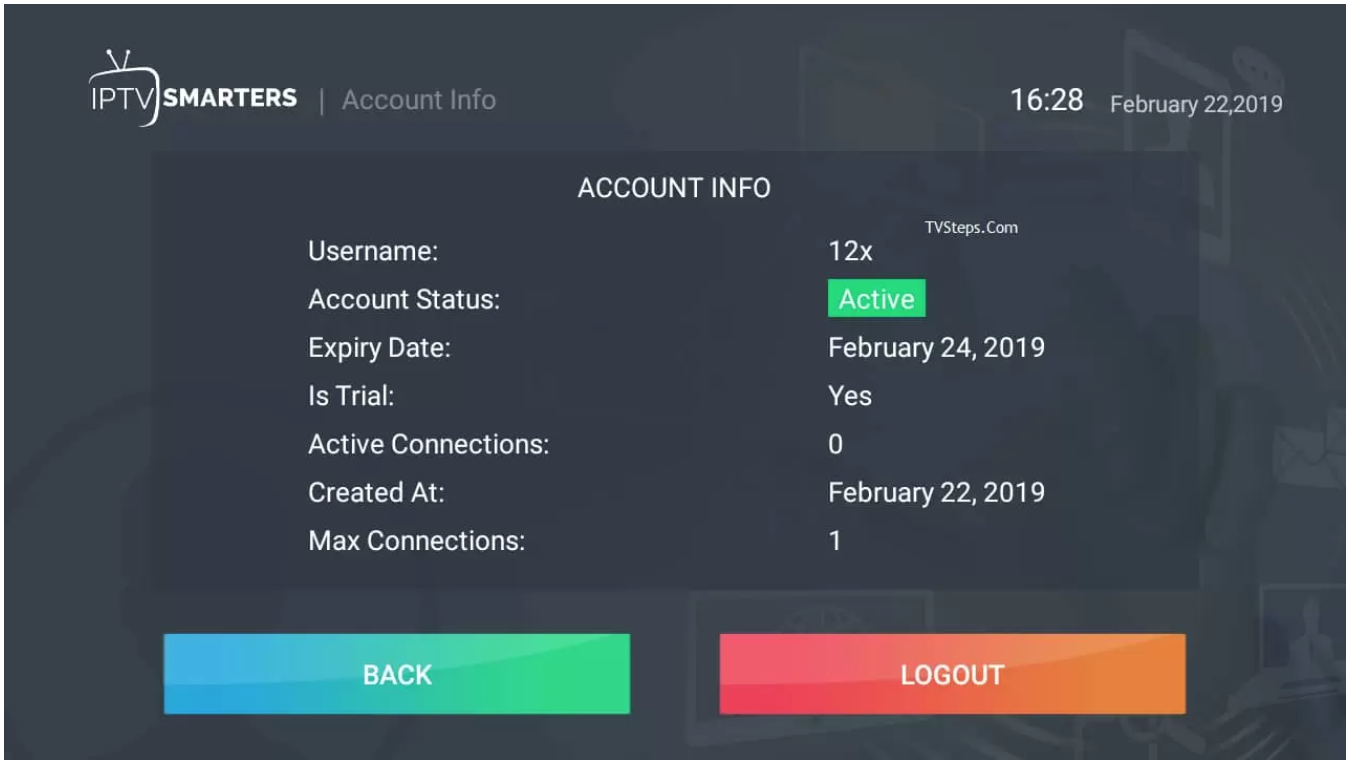
Account Info:
The second icon on the dashboard, located after the notification bell, provides information about your subscription when clicked.
This includes details such as the expiration date, trial information, the maximum number of connections allowed, and the date the subscription was created.
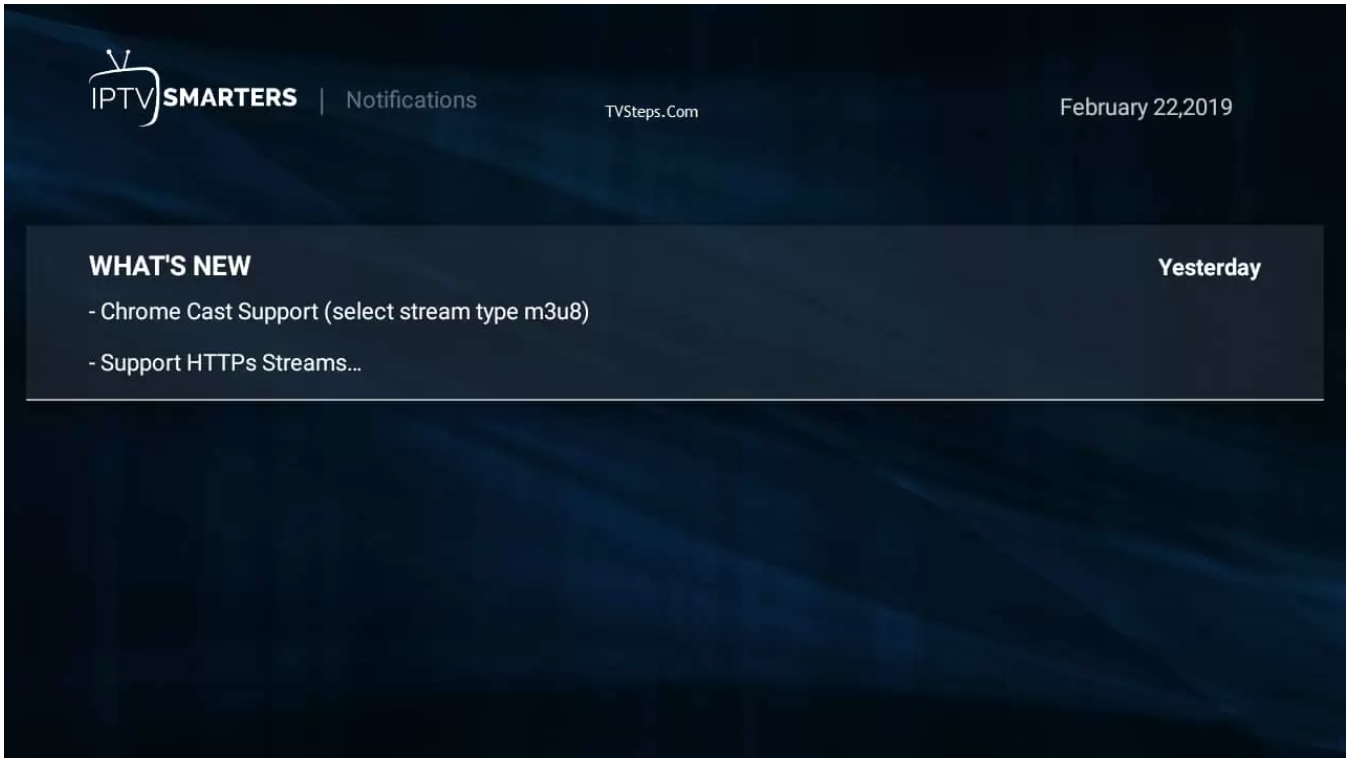
Notifications:
When you have been using the app for a while, you may receive notifications about new features that have been added. These notifications can help you stay informed about updates and improvements to the app.
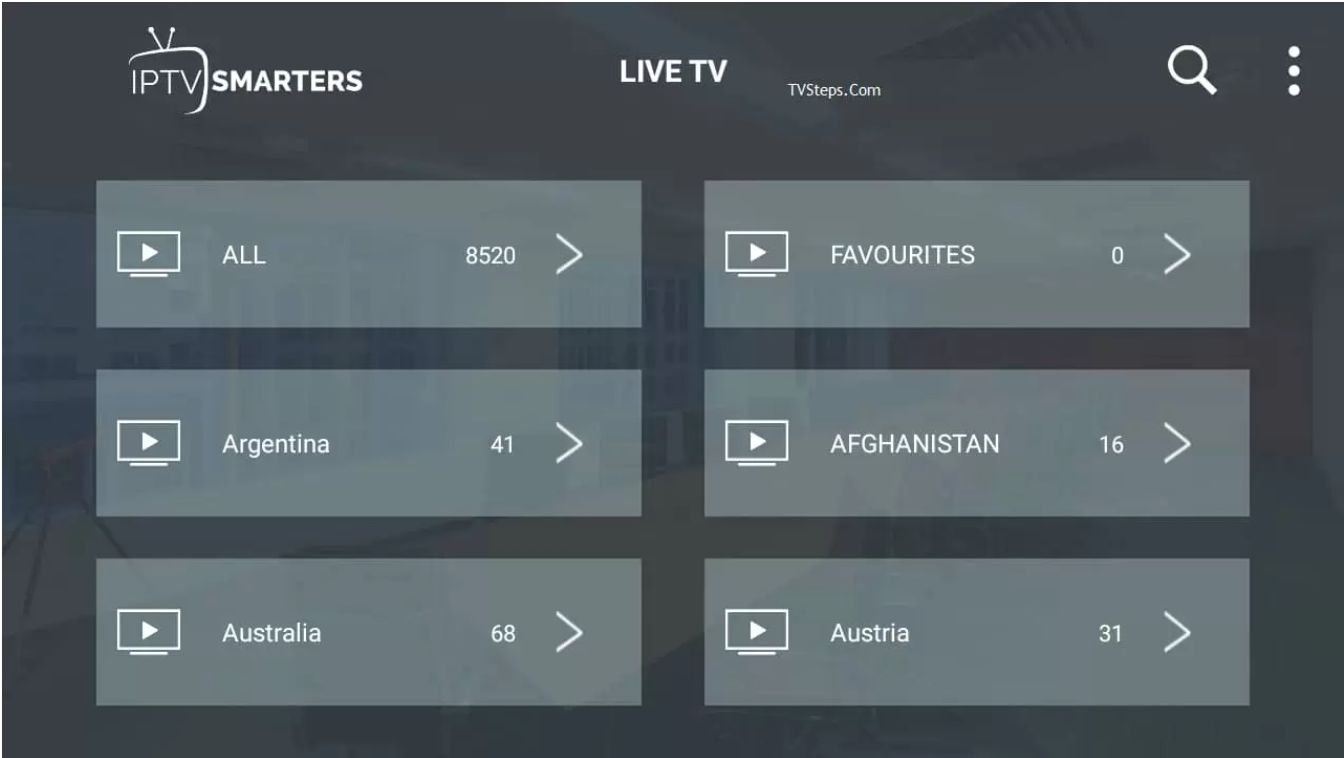
LIVE TV:
Clicking on LIVE TV will show you categories country-wise.
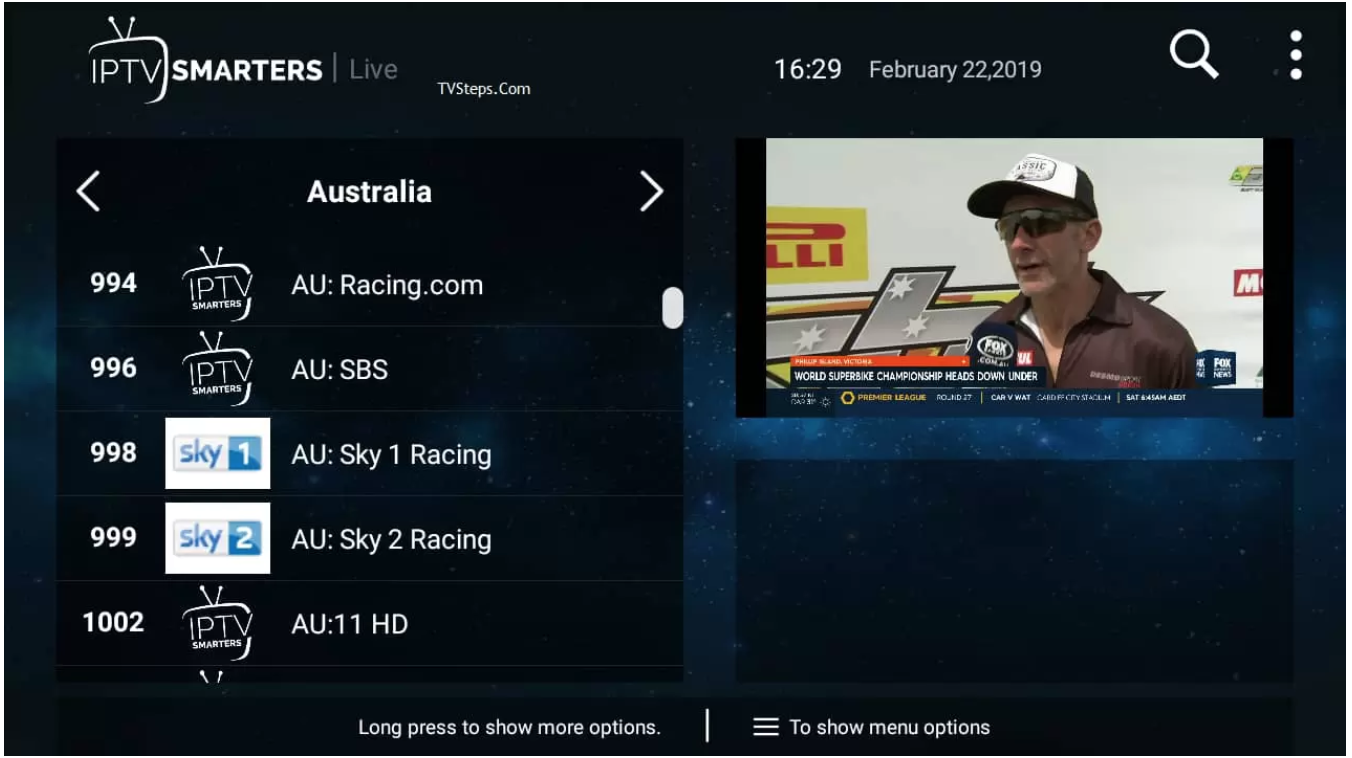
Clicking on a category will open the list of available channels and load icons (if available).
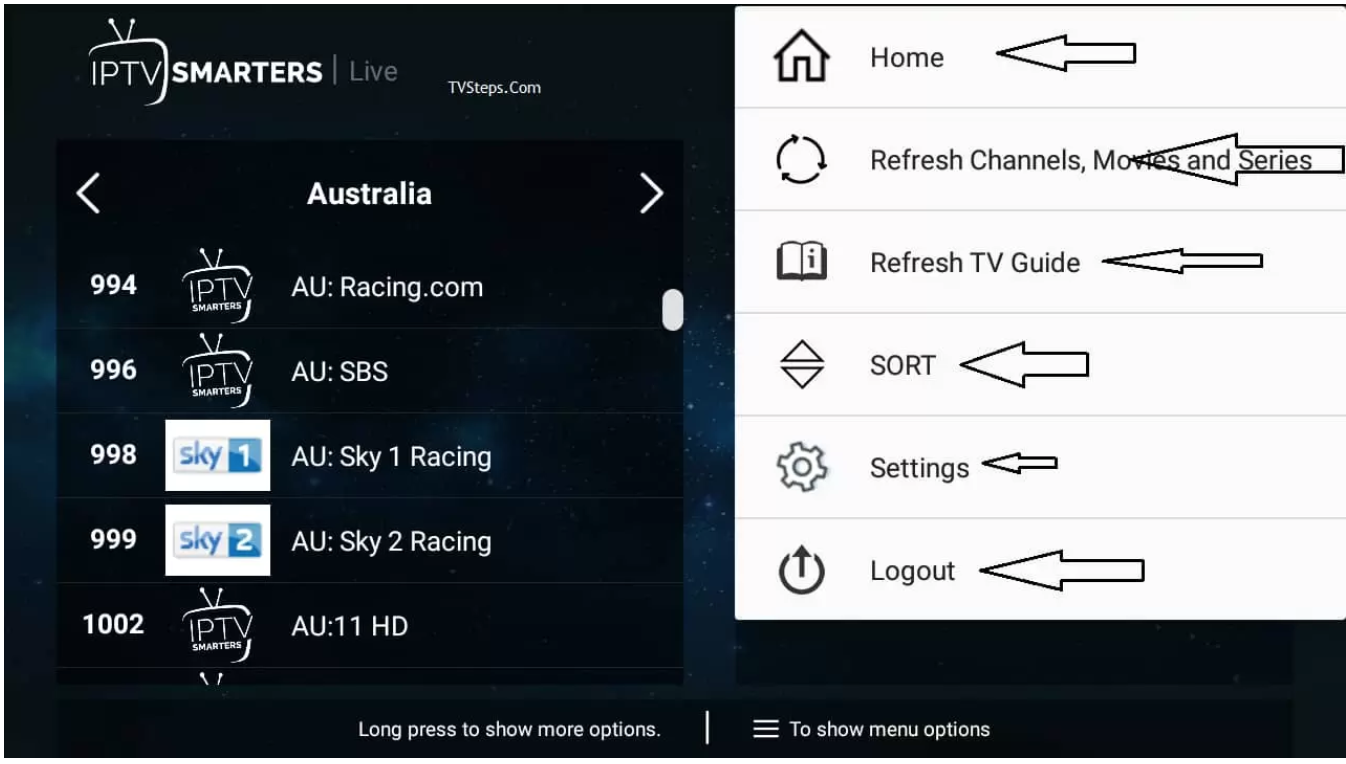
You can press the tab button and get quick access to a few great features, including updating EPG and List.
Long press the channel name, and you will see options like recording and favourites.
Settings:
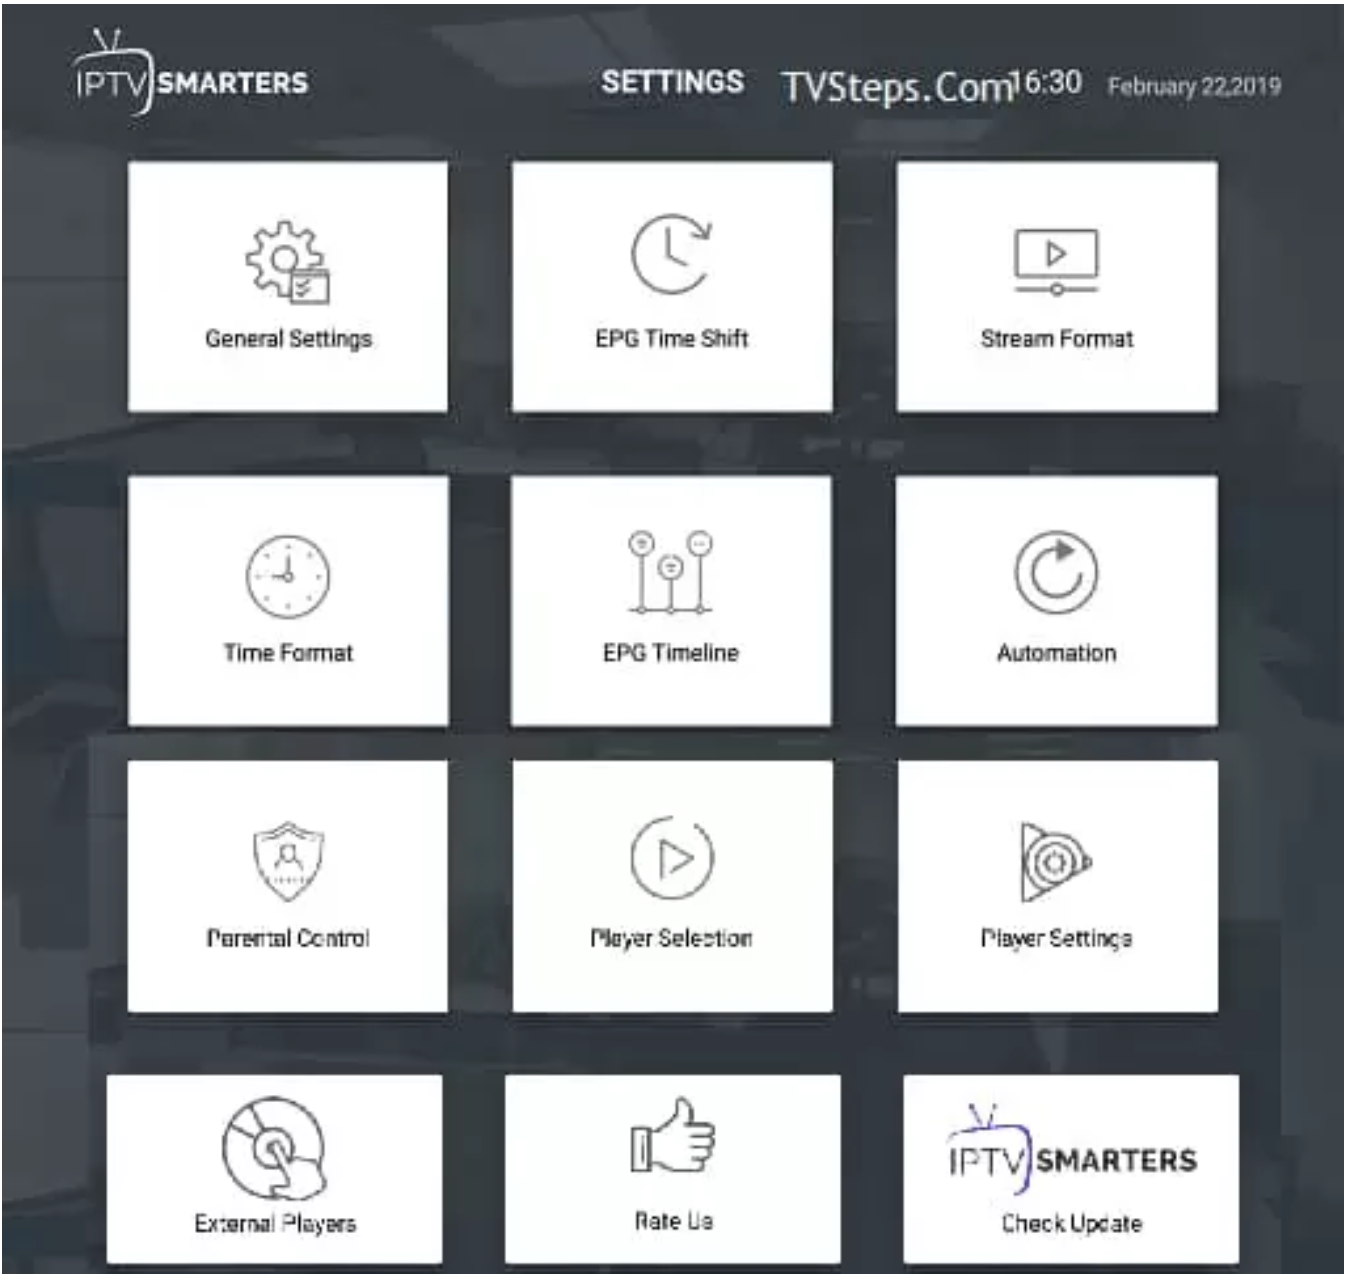
There are many setting options let's cover 1 by one.
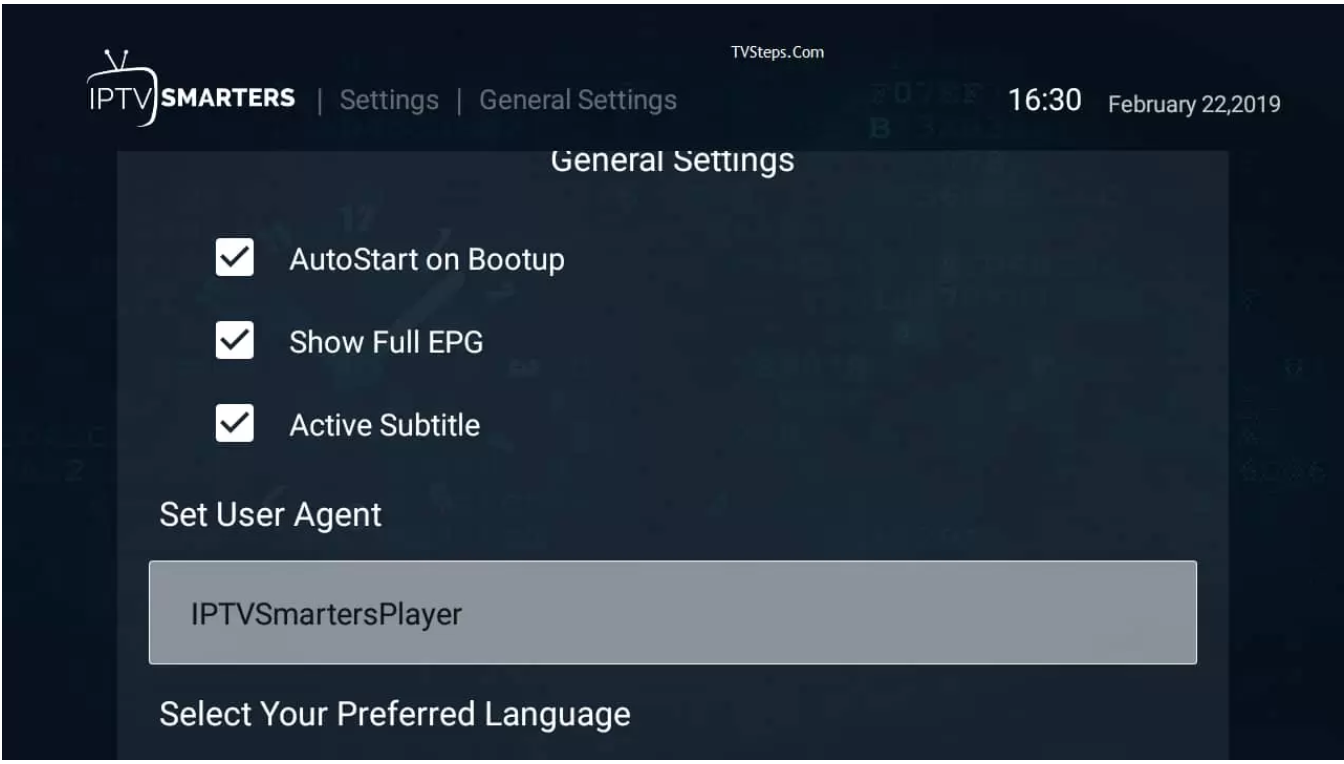
General Settings:
You can set up AutoStart on bootup, Show Full EPG, Active Subtitles, Set user agent and change language. By default, the settings are correct. If you want to change, you can do it here.
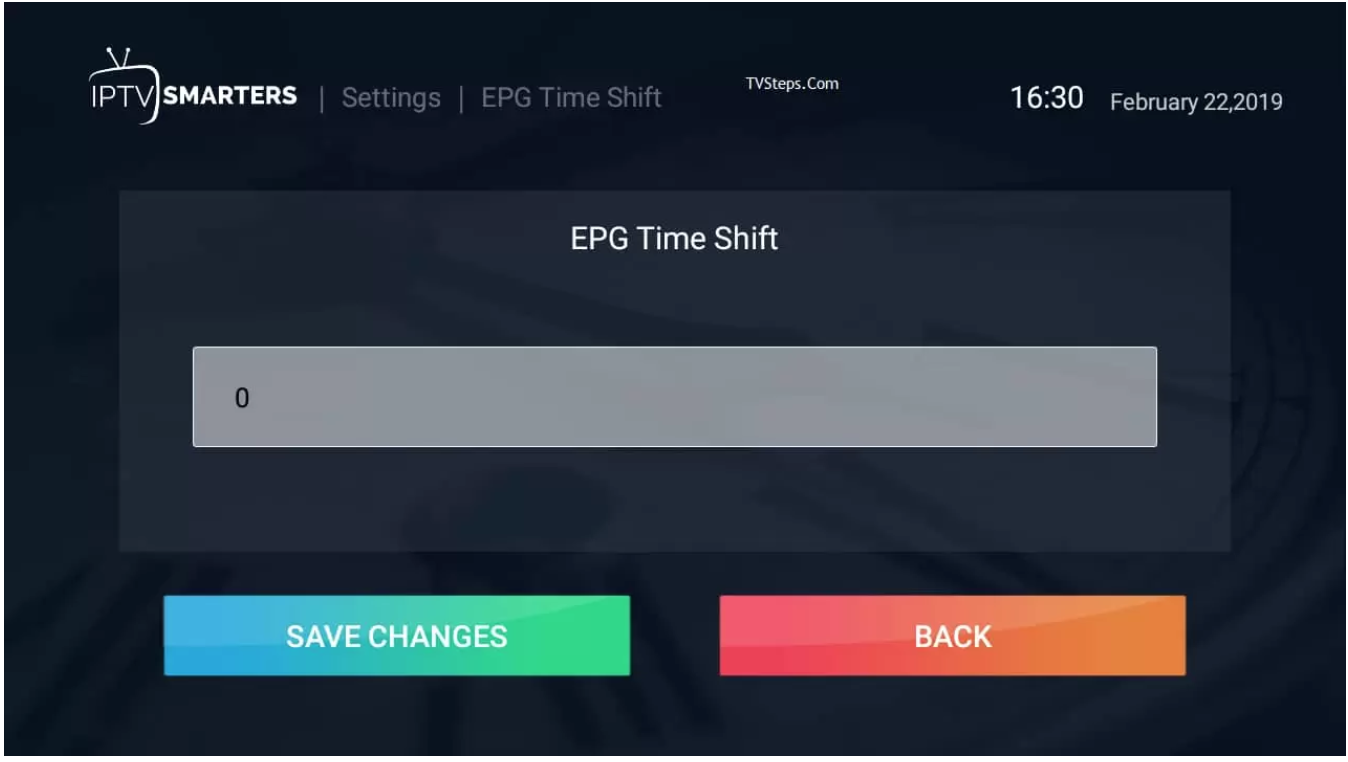
EPG Time Shift:
By default, it's 0; you can change it to any number and save it.
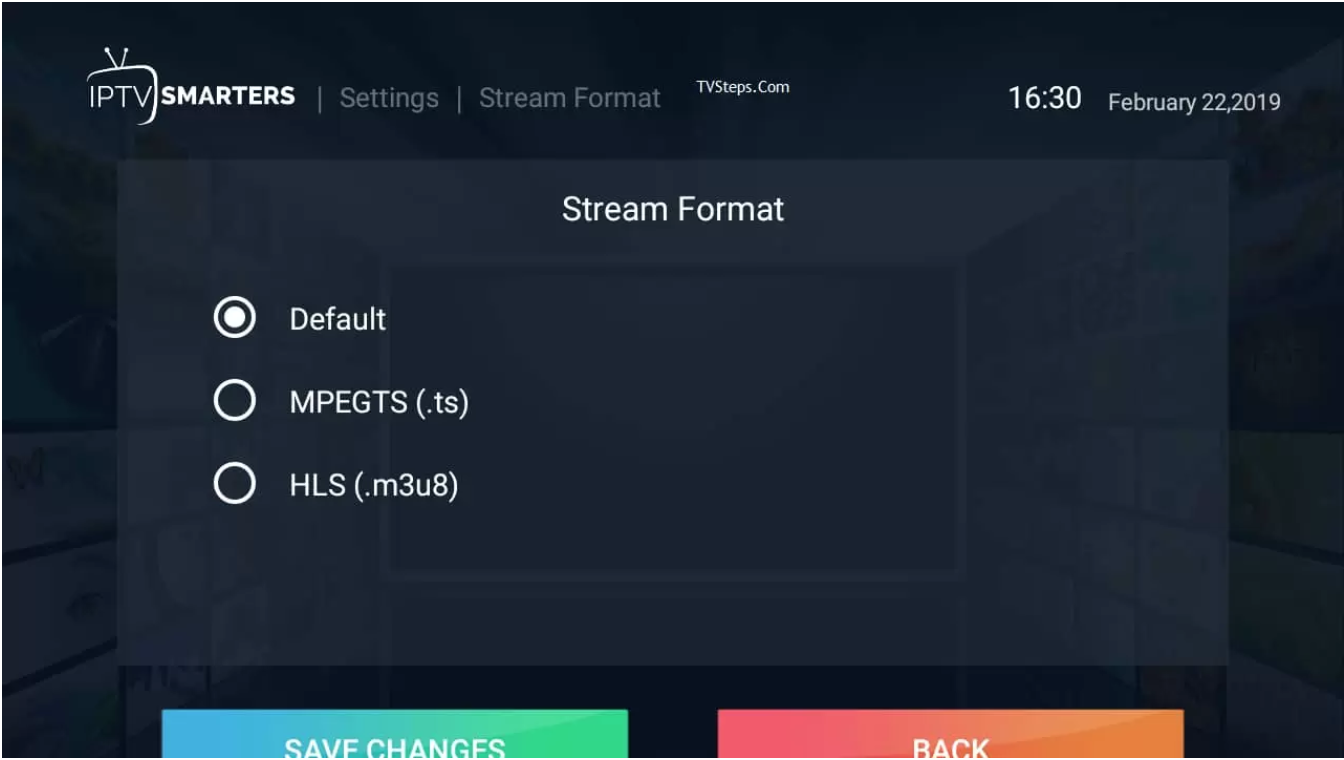
Stream Format:
Select default; you can save it in MPEGTS (.ts format) or HLS (.m3u8) format. Most commonly used in MPEGTS.
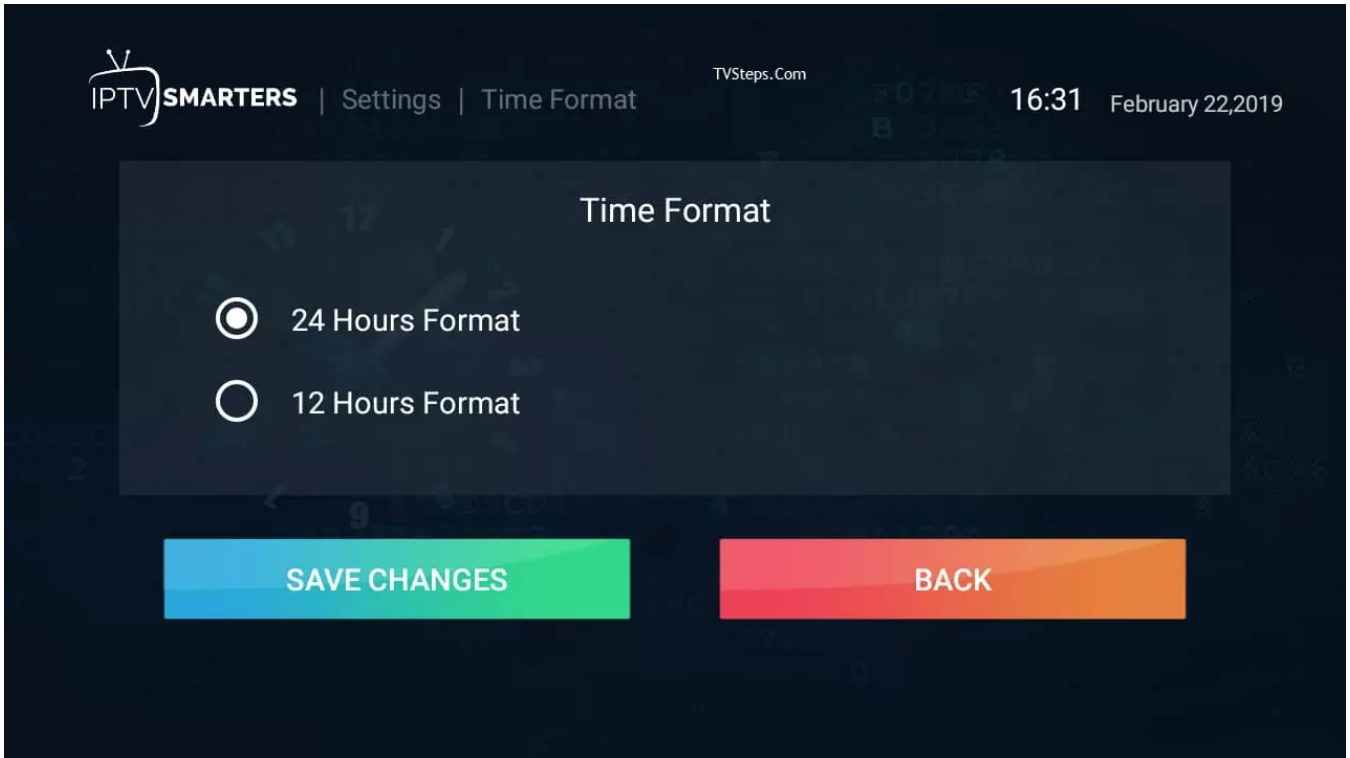
Time Format:
By default, it's 24 hours. You can change it to 12 hours and save it.
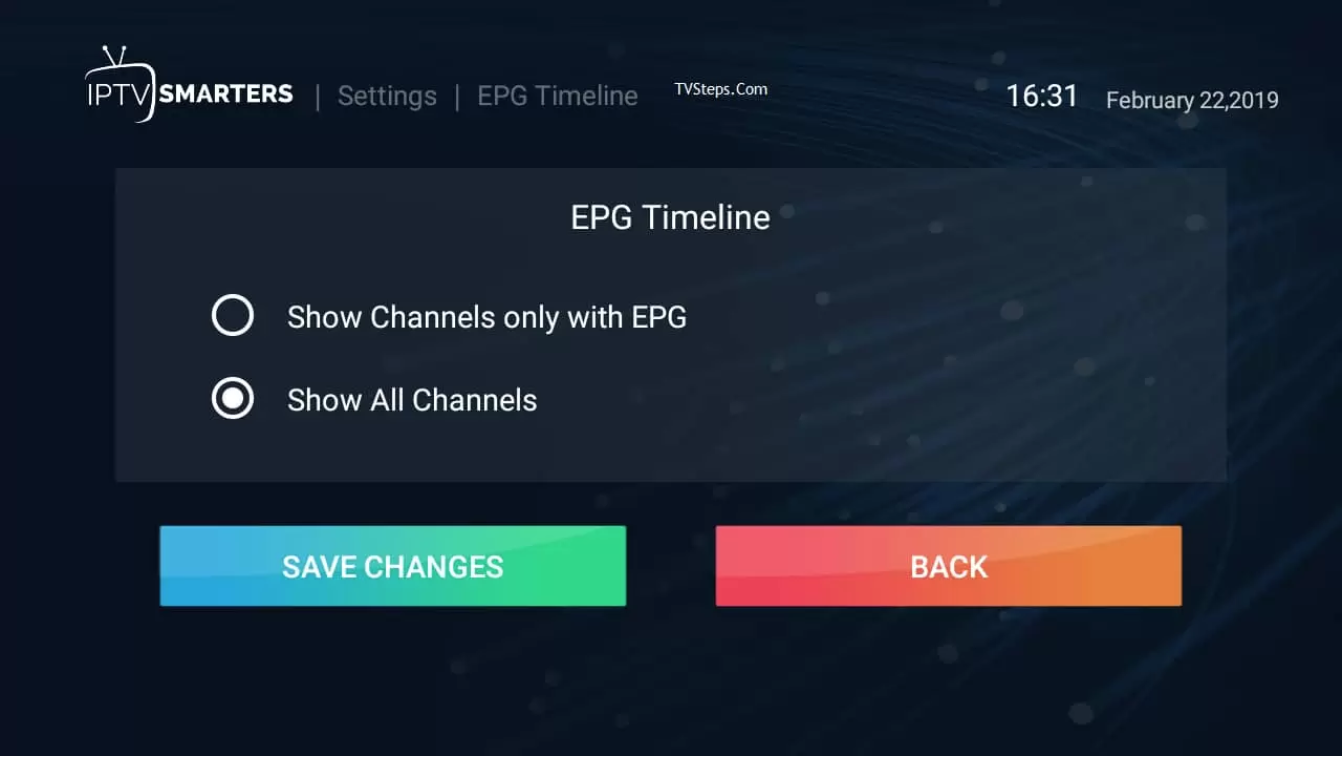
EPG Timeline:
The default selected is Show All channels, but I recommend going to Show Channels only with EPG. So if there is no EPG with any channel, it will show nothing up there; otherwise, a default message will keep showing there.
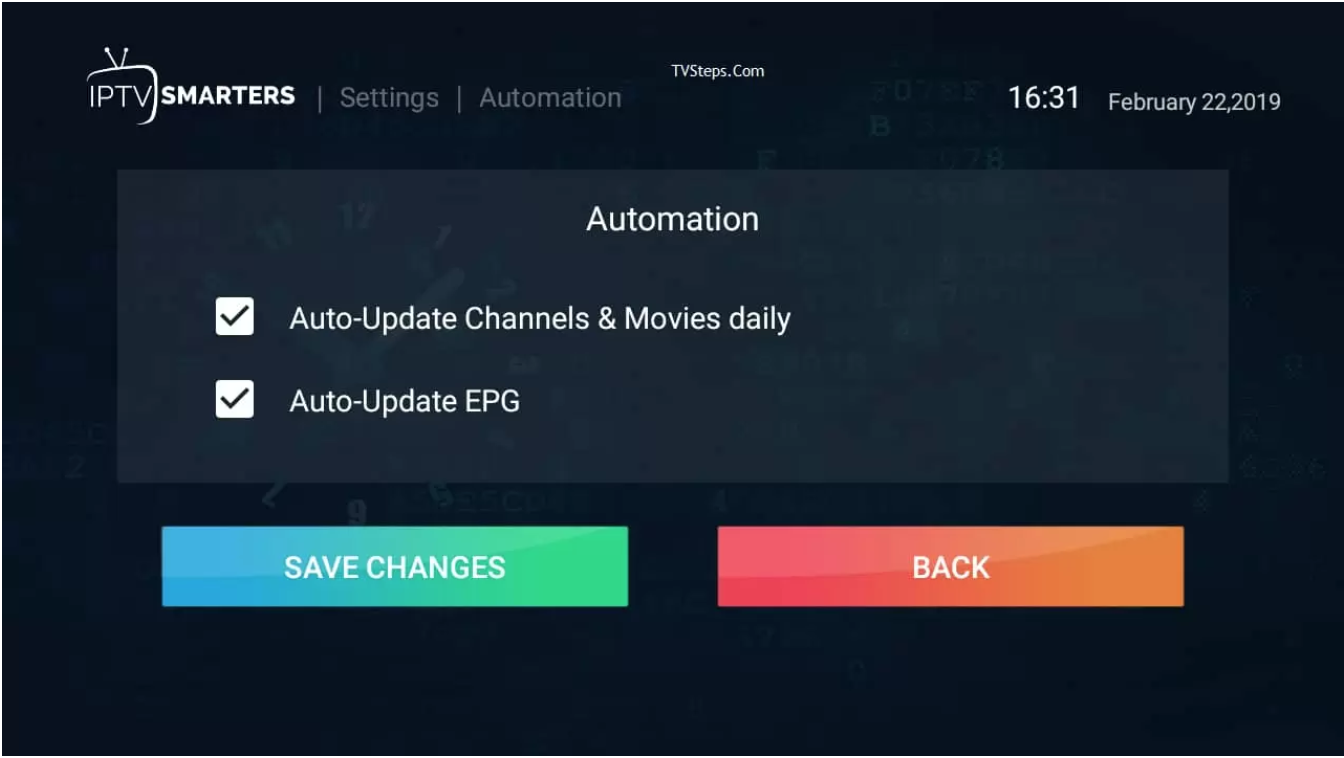
Automation:
Keep both options checked, as they are checked by default already. If wanna change, you can uncheck it here.
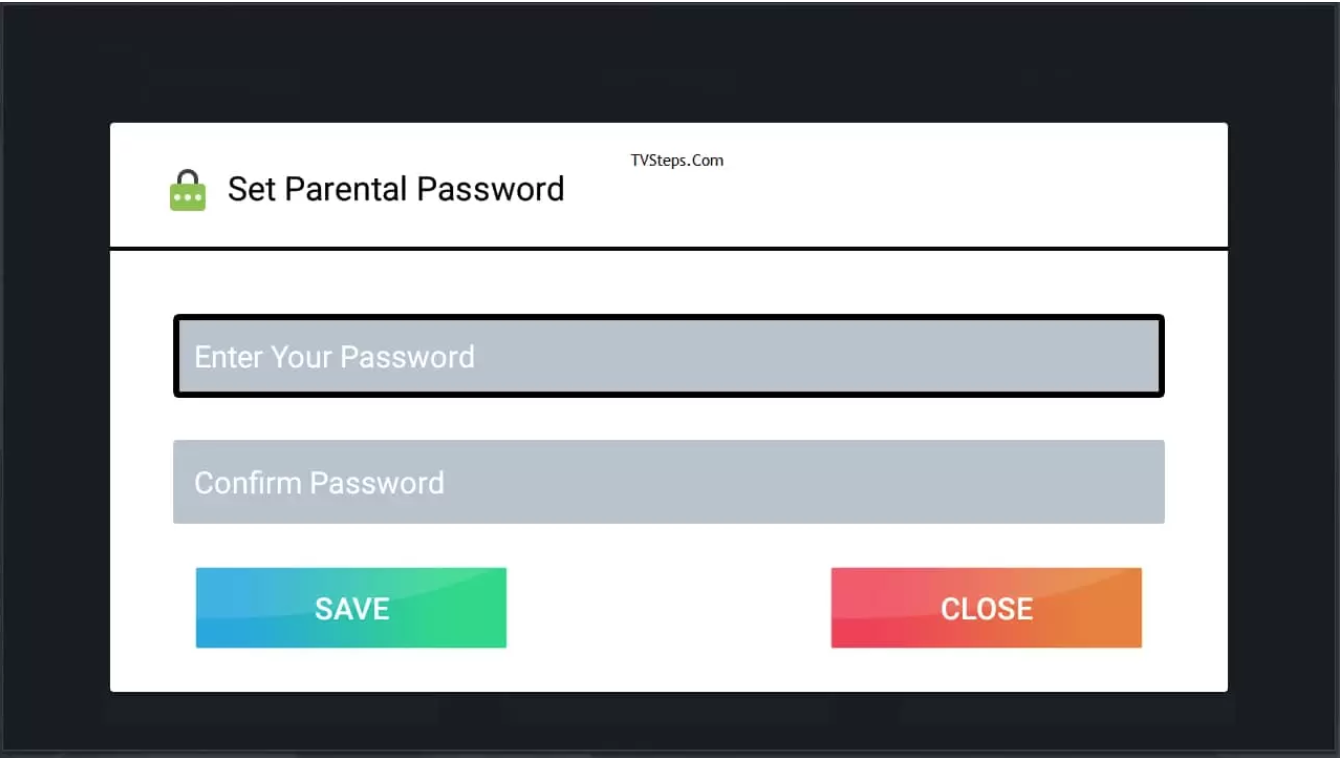
Set Parental Password:
This is a security feature that allows you to lock certain channels, such as those that may not be suitable for children, with a password.
This means that when someone attempts to access a locked channel, they will be prompted to enter the password before they can stream it.
This is useful if you have children at home and want to restrict their access to certain channels.
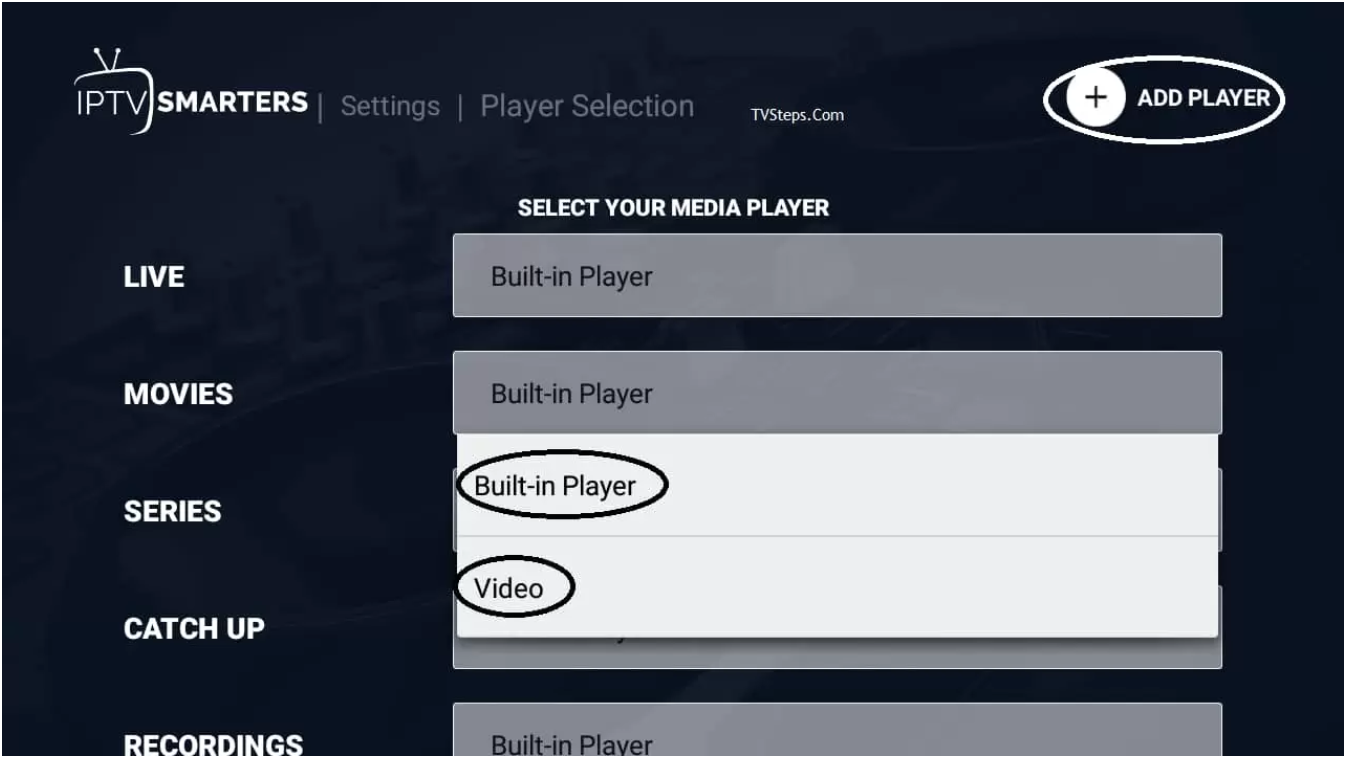
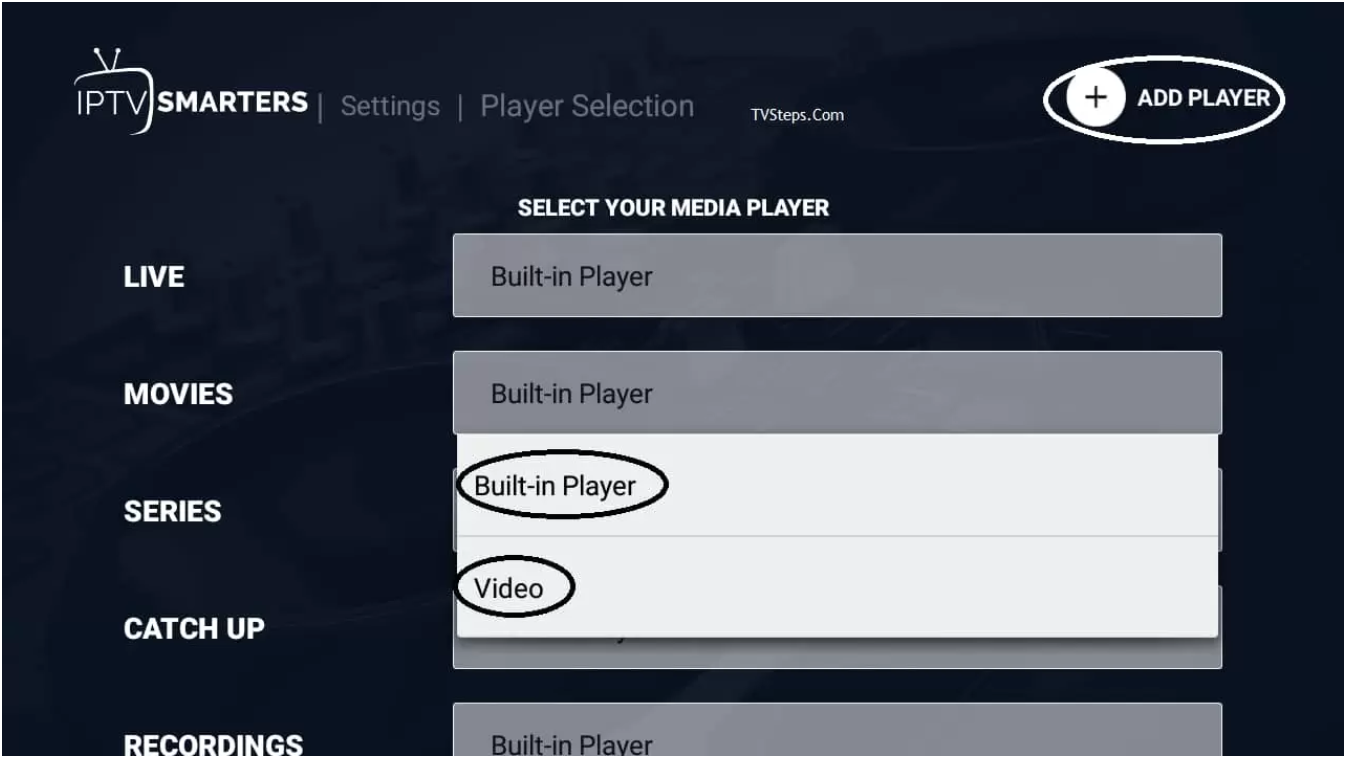
Player Selection:
By default, the built-in player will be selected, but you can change it by clicking on the "ADD PLAYER" button and selecting a different player. (Instructions for adding a player can be found in the next steps.)
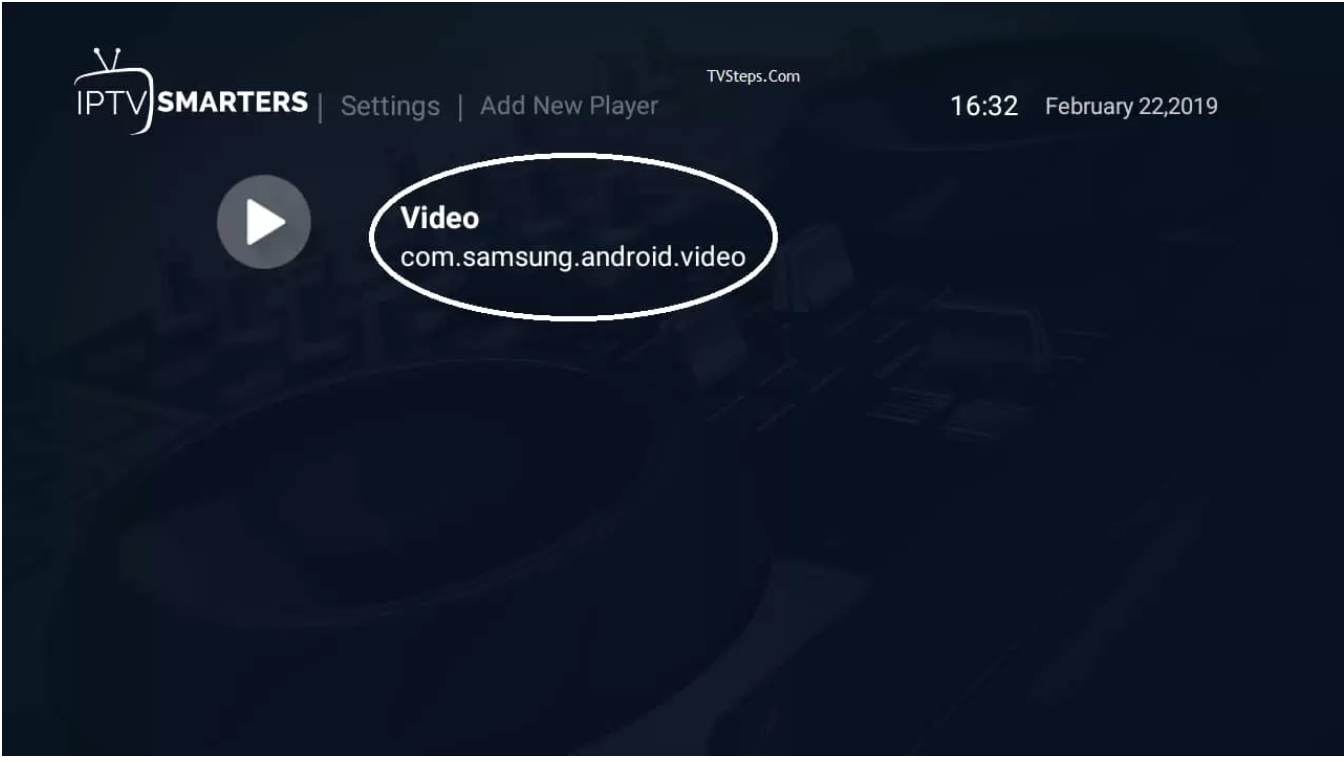
When you want to click on ADD PLAYER, it will show you, available players.
Click on the player you want, and it will confirm adding. Click on Add
Now back to Player selection, clicking on the built-in player will show you another player you just selected and you can save it. Next, when you play selected media, it autoplay in your chosen player.
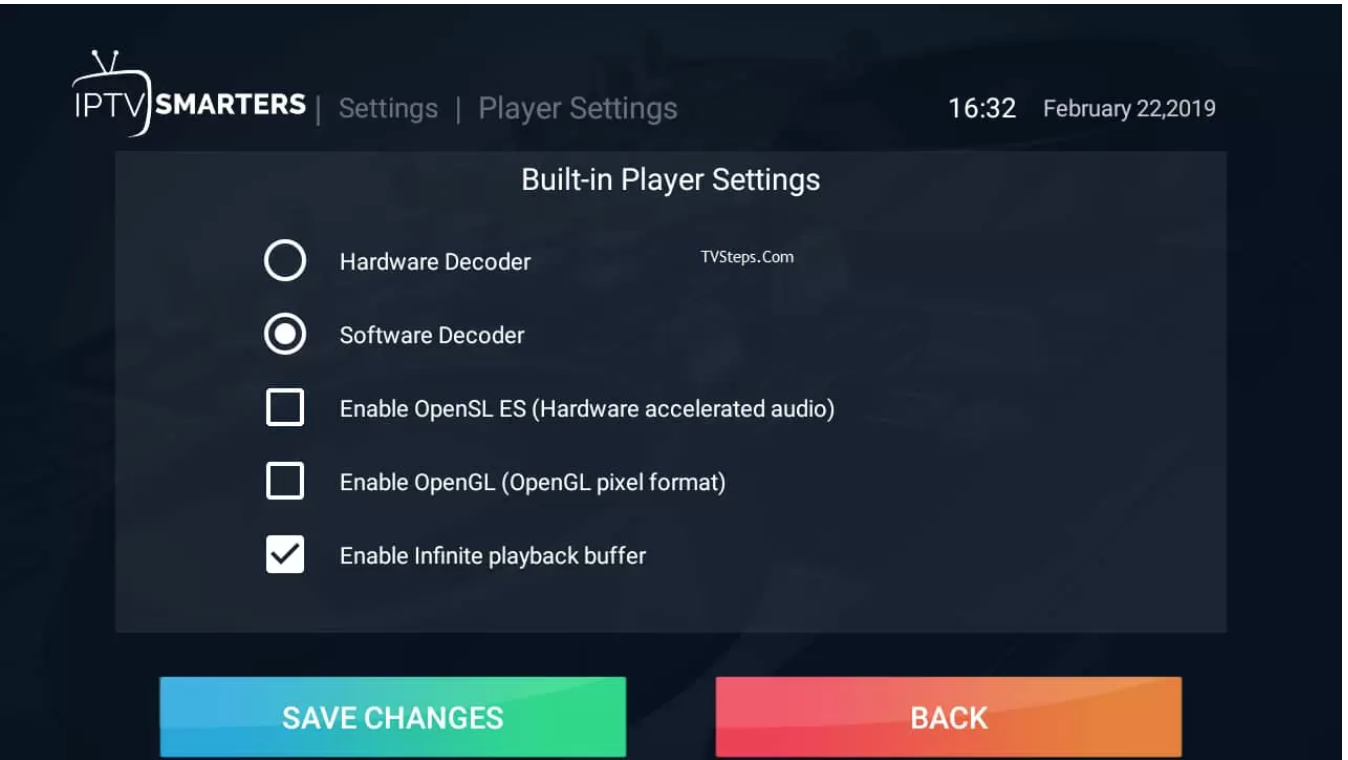
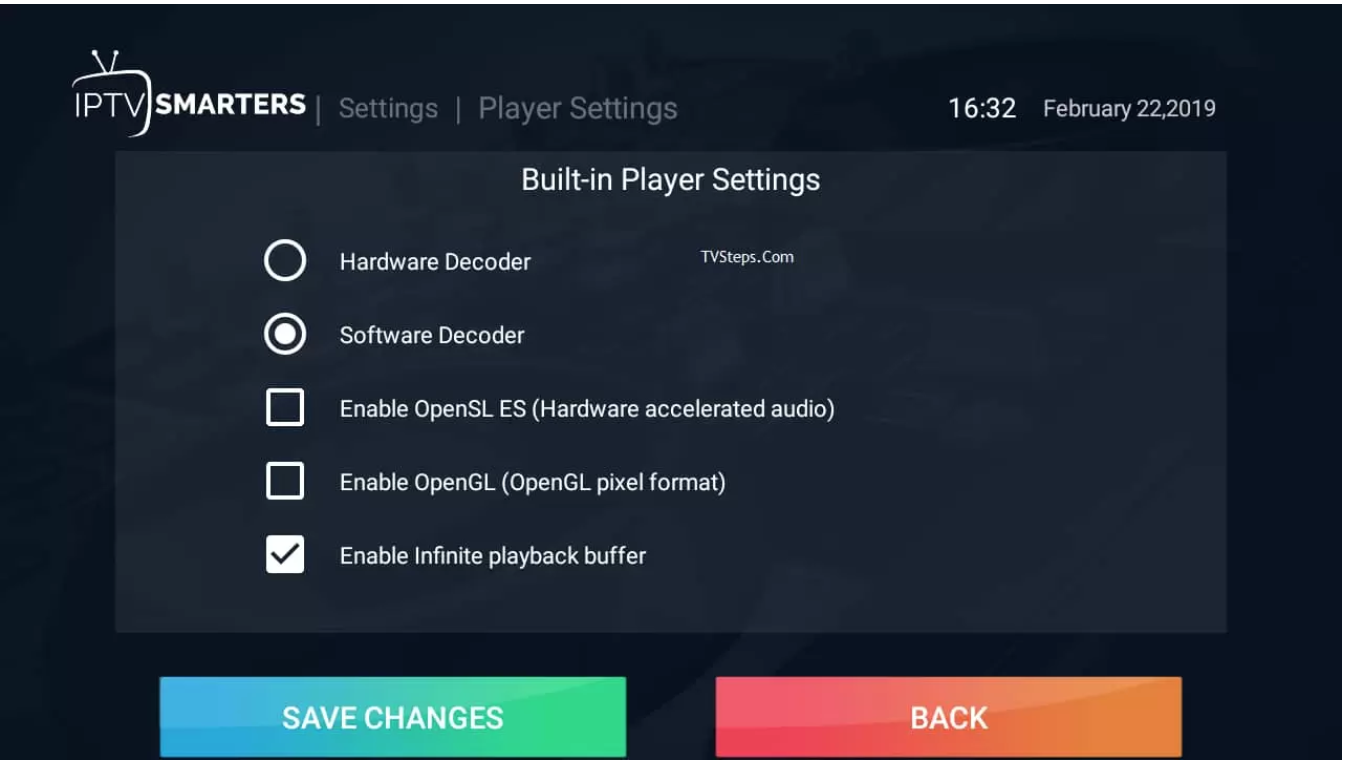
Player Settings:
There are more settings for your player; I will suggest keeping the default settings.
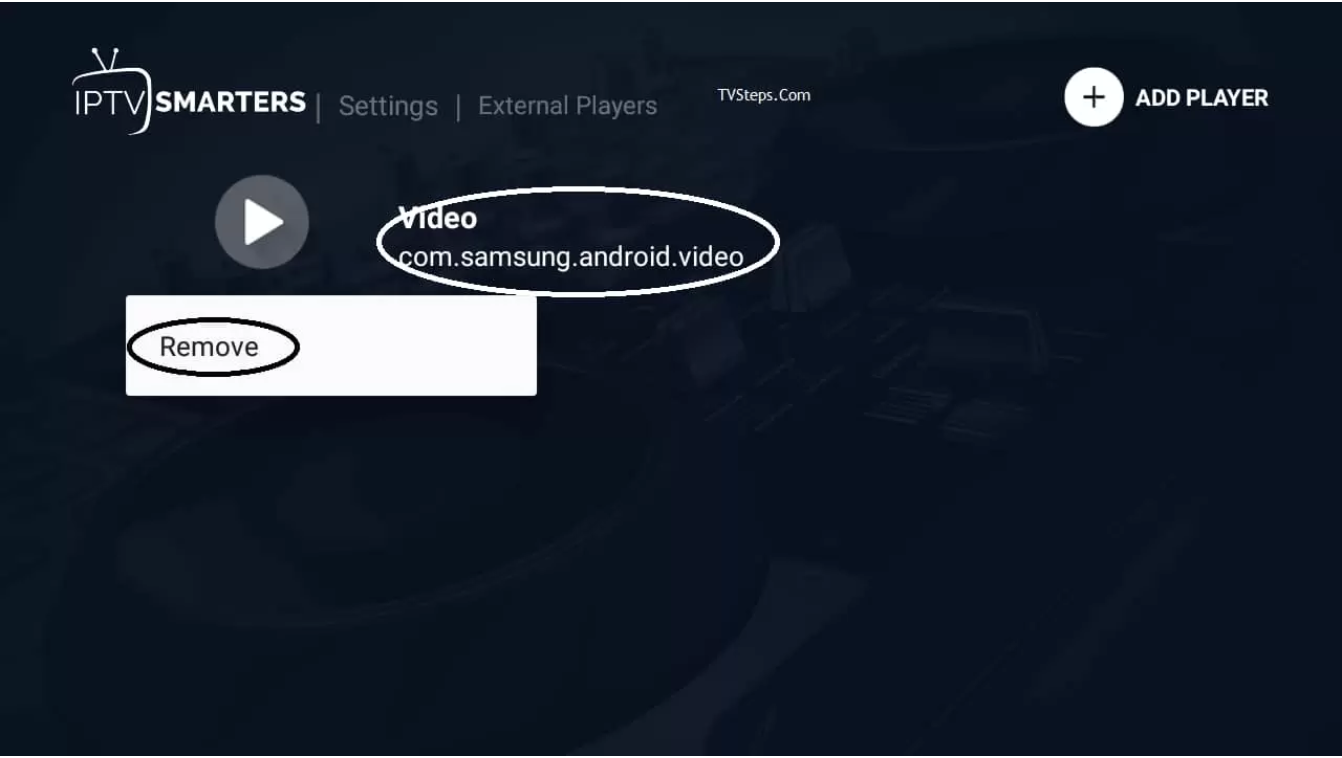
External Players:
You will be presented with a list of external players that you have previously added.
To remove one of these players, you can either click on the player's name or long-press on the title and select the option to remove it. Once you have selected the option to remove the player, it will be removed from the list.
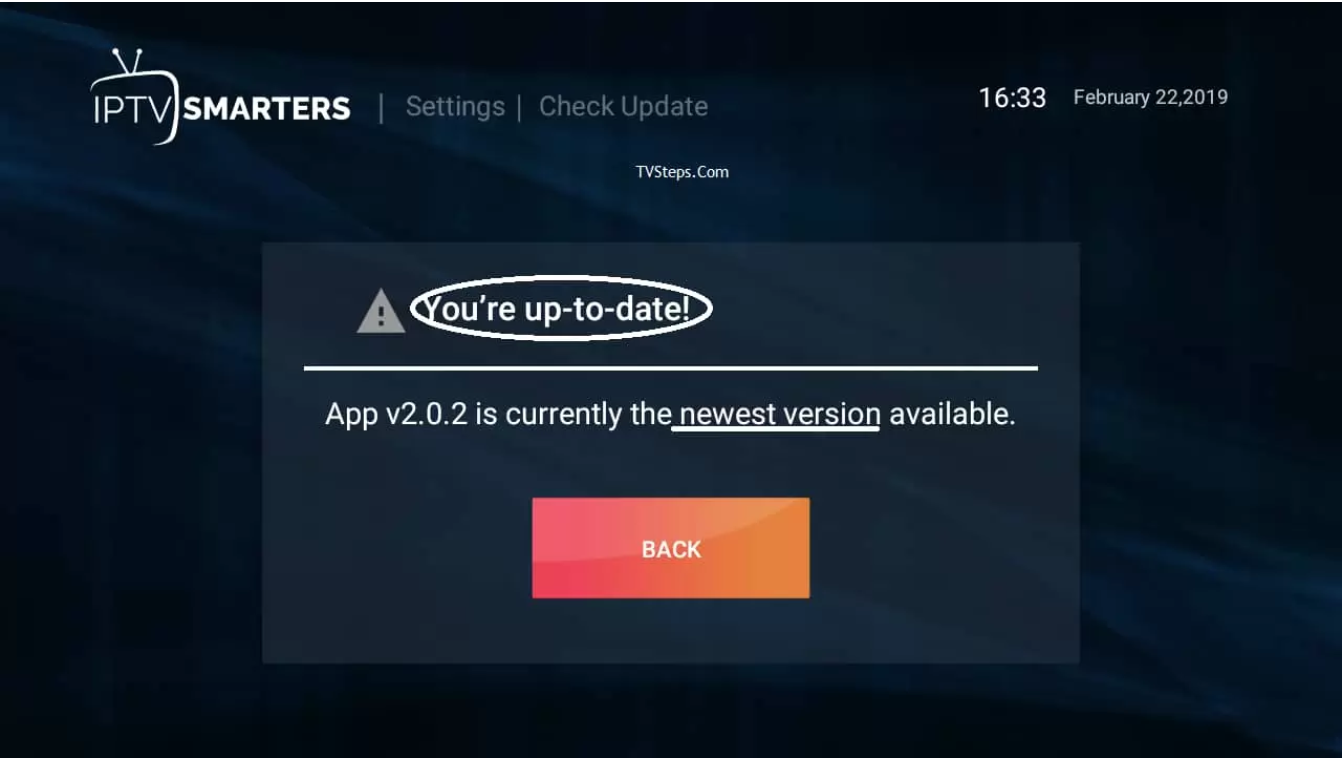
Checking for Updates:
Click on it, and it will update it if an update is available.
Finally IPTV Smarters Pro is ready!
These IPTV Smarters Pro settings can be applied on Android TV Box, Firestick, and other popular supported operating systems.
I hope it helped you a lot.

Komentar
Posting Komentar